
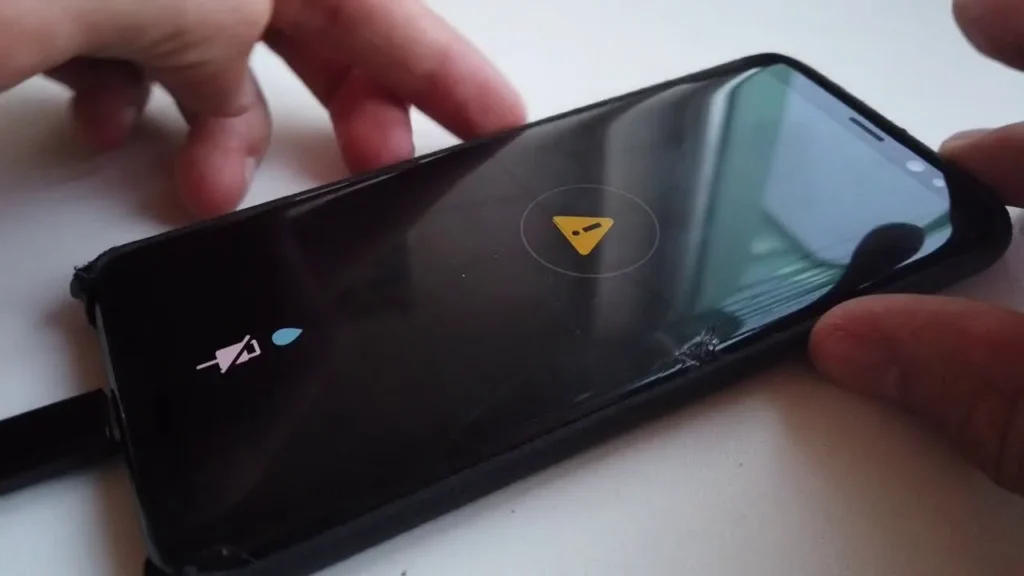
How to Fix “Moisture Detected” in Charging Port
The “Moisture detected in your charger/USB port” warning occurs when the device’s Power Management Integrated Circuit (PMIC) or USB Type-C controller detects abnormal electrical conductivity or a drop in resistance between the power rail ($V_{BUS}$), the Configuration Channel pins ($CC1/CC2$), and Ground ($GND$). To prevent electrolytic galvanic corrosion or catastrophic short circuits across the $0.5text{mm}$ pin pitch, the operating system kernel opens an internal field-effect transistor (FET) switch, blocking incoming charging current until the impedance across the bus returns to a safe mega-ohm threshold.
Quick Diagnostic Matrix
| Symptom | Root Cause | Inspection / Path | Recommended Fix |
| Alert triggers after swimming, rain, or steam exposure | Liquid bridging adjacent pins inside the USB-C cavity | Physical Port Inspection | Tap out trapped water; use passive room-temperature fan airflow (do not use heat or rice). |
| Port is bone dry, but alert stays on permanently | Stale hardware fault flags locked in the system USB daemon cache | Settings > Apps > USBSettings | Force stop and Clear Data on the system USBSettings application. |
| Alert appears only when connecting a specific cable | Corroded cable tip, damaged CC pin, or bent contact pin inside the connector | Charging Cable / Adapter | Inspect cable pins for black carbon scorch marks; swap to a certified OEM cable. |
| Alert persists across reboots on a dry phone | Moist pocket lint or conductive salt/mineral crust bridging contacts | Port Cavity / Magnification | Clean debris with a non-conductive pick and flush with 99% Isopropyl Alcohol (IPA). |
| Battery is at 0% and phone refuses to charge | Kernel safety lock preventing boot while PMIC detects false positive | Boot Splash Sequence | Execute the Pre-Boot Plug-in Bypass to charge while the OS daemon is offline. |
1. Evaporate Trapped Liquid (Avoid Rice and Heat)
Surface tension holds microscopic water droplets between the central pin connector tongue and the outer metallic housing. Accelerating evaporation incorrectly can damage the port’s water-resistant adhesive seals.
[Port Drainage & Drying Workflow]
 1. Hold phone vertically with the USB-C port facing directly DOWNWARD.
 2. Gently tap the bottom against your palm to dislodge liquid droplets.
 3. Place device in front of a cool-air fan or open-air draft.
 4. [CRITICAL]: DO NOT use blow dryers, heat guns, compressed air, or rice.
Never Use Heat Guns or Hair Dryers: Heating the port degrades the rubber waterproofing gaskets and melts the delicate adhesive membranes protecting the internal microphones and bottom speaker cavities.
Never Use Compressed Air: High-pressure propellant drives liquid deeper past the internal silicone O-rings into the phone’s main chassis, potentially triggering internal Liquid Contact Indicators (LCIs).
Avoid Raw Rice: Desiccant myth aside, rice starch leaves a sticky, conductive residue inside the port that absorbs ambient humidity and bakes into a cement-like paste around the gold contact fingers.
The Correct Method: Place the phone upright with the port facing down in front of an electric desk fan for 1 to 2 hours. Ambient airflow evaporates residual moisture without risking thermal or mechanical damage.
2. Purge Conductive Pocket Lint and Salt Crust
Pocket lint is naturally hygroscopic: it siphons sweat and atmospheric humidity, holding moisture against the pins long after the phone feels dry. If the device was exposed to saltwater, chlorinated pool water, or sweat, dried salt and mineral crystals remain behind, creating a conductive bridge that trips the sensor indefinitely.
[USB Type-C Connector Cross-Section]
 ┌────────────────────────────────────────────────────────┐
 │   A1   A2   A3   A4   A5   A6   A7   A8   A9   A10  A11  A12   │
 │ [GND][TX1+][TX1-][VBUS][CC1][ D+ ][ D- ][SBU1][VBUS][RX2-][RX2+][GND]│
 │ ░░░░░░░░░░░░░░░░░░░░░░░░░░░░░░░░░░░░░░░░░░░░░░░░░░░░░ │ <── Trapped Lint / Salt Crust
 │ [GND][RX1+][RX1-][VBUS][SBU2][ D- ][ D+ ][CC2][VBUS][TX2-][TX2+][GND]│
 │   B12  B11  B10  B9   B8   B7   B6   B5   B4   B3   B2   B1    │
 └────────────────────────────────────────────────────────┘
Power off the smartphone completely.
Use a bright flashlight and magnification to inspect the base of the port around the central wafer tongue.
Take a plastic dental flosser pick, wooden toothpick, or precision ESD-safe plastic probe. (Never use metal SIM ejector pins, needles, or paperclips—they will strip the microscopic gold electroplating from the pins or cause a dead short).
Gently scrape along the bottom floor and corners of the cavity to pull out compacted lint rings.
If dried salt or liquid residue is visible on the pins:
Lightly dampen an interdental brush or the tip of a lint-free swab with 99% anhydrous isopropyl alcohol (IPA).
Gently swab the pins to dissolve mineral deposits.
Allow 10 minutes for the 99% alcohol to fully evaporate.
3. Clear System USB Cache (Samsung USBSettings)
On Android devices (specifically Samsung Galaxy devices), the moisture detection state is monitored by a low-level background service named USBSettings. Even after the hardware dries completely, the application often fails to clear its saved fault string from volatile memory.
[Android Settings (Samsung Galaxy)]
 └── Apps > Filter / Sort Icon > [Toggle ON] "Show system apps"
      └── Scroll to "USBSettings"
           └── Storage
                ├── [Tap] "Clear Cache"
                └── [Tap] "Clear Data" ──► Restart Phone
Open Settings on your phone.
Tap Apps.
Tap the Filter and sort icon (next to “Your apps”) and toggle Show system apps to On, then tap OK.
Scroll down the list and select USBSettings.
Tap Force stop at the bottom of the screen.
Select Storage.
Tap Clear Cache, then tap Clear Data.
Restart your phone. The operating system will recreate the USB hardware register table from scratch upon boot.
4. Execute the Pre-Boot Plug-in Bypass
If your battery is completely drained (0%) and the phone rejects incoming power—or if the warning is stuck in the user-space operating system layer—you can bypass the detection daemon by feeding current before the Android kernel loads the USB monitoring service.
[Pre-Boot Bypass Sequence]
 1. Power off the phone (or let battery deplete completely).
 2. Connect the charging cable to a wall adapter.
 3. Plug the cable into the phone.
 4. IMMEDIATELY watch for the initial battery outline / charging circle.
 5. Power ON the device as soon as the charging animation begins.
Turn off your device completely.
Connect your original charger into a working AC wall outlet.
Plug the USB-C cable into the phone.
The Timing Window: The low-level bootloader initiates a basic 5V trickle-charge hardware test before loading the Android OS and its safety daemons.
If the charging screen appears showing a percentage, leave it off and let it charge up to at least 20–30%.
If the moisture beep triggers while off, unplug the cable, hold down the Power button (or Power + Volume Down) to initiate a boot, and insert the cable the exact split-second the manufacturer logo appears on screen. This feeds power to the board before the system service mounts.
5. Wipe Cache Partition via Android Recovery
If underlying system files contain corrupted battery calibration or fast-charging profiles, wiping the staging cache partition resolves software loops without deleting any user photos, contacts, or apps.
Turn off the device completely.
Connect the phone to a PC or Mac via a USB cable (modern Android versions require a data connection to enter recovery mode).
Press and hold the Volume Up + Power buttons simultaneously until the Android Recovery menu displays.
Use the Volume Down button to navigate the menu and highlight Wipe cache partition.
Press the Power button to select it.
Highlight Yes and press the Power button to confirm.
Once the operation finishes (reading “Cache wipe complete” at the bottom), highlight Reboot system now and press the Power button.
6. Workaround with Wireless Charging & Hardware Sub-Board Swap
If you need your phone functional immediately or if the charging port pins are physically bent or corroded, use these hardware pathways:
[Alternative Charging Architecture]
 ┌────────────────────────────────────────────────────────┐
 │ Qi / PMA Wireless Charging Coil (Inductive Coupling)   │ ──► Bypasses USB-C Port
 └────────────────────────────────────────────────────────┘
Qi Wireless Charging Bypass: The moisture detection circuit isolates only the physical USB Type-C port rails. Inductive wireless charging interfaces directly with the battery fuel gauge and secondary receiver coils, allowing you to charge the phone at full speed regardless of whether the moisture warning is flashing on screen.
Replace the Modular USB Daughterboard: On most modern Android smartphones, the USB-C port is not soldered to the expensive main motherboard; it sits on an independent, inexpensive sub-board (daughterboard) connected via a flex cable. If the internal gold pins have suffered galvanic oxidation (appearing blackened or green), or if the PMIC sensor has burned out, replacing the sub-board module completely clears the error.