
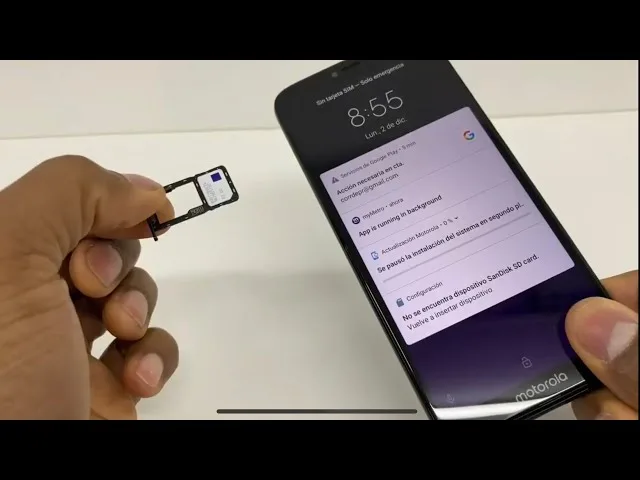
How to Fix SIM Card Not Working: No SIM Detected, Invalid SIM, & Carrier Provisioning Errors
A “No SIM,” “Invalid SIM,” or “SIM Not Provisioned” error occurs when the smartphone’s baseband processor fails to establish an electrical handshake with the subscriber identity module via the ISO/IEC 7816 smart-card interface, or when the carrier’s Home Location Register (HLR) rejects the International Mobile Subscriber Identity (IMSI). When a phone suddenly stops recognizing a physical SIM card or an active eSIM profile, the breakdown stems from oxidized contact pads, mechanical tray micro-play, corrupted cellular baseband cache, or network provisioning mismatches.
Quick Diagnostic Matrix
| Symptom | Root Cause | Setting / Diagnostic Path | Recommended Fix |
| “No SIM Card Installed” appears intermittently | Surface oxidation on gold contacts or degraded mechanical spring tension in the SIM tray | Physical tray / *#06# | Clean contacts with 99% isopropyl alcohol; inspect tray alignment and verify IMEI is visible via dialer. |
| “SIM Not Provisioned MM#2” or “Phone Not Allowed” | Carrier backend (HLR/HSS) suspended the IMSI, or the SIM card has been retired/swapped | Carrier Support / Account Portal | Call carrier to re-authorize the ICCID or swap to a freshly provisioned SIM card. |
| “Invalid SIM” or “Network Locked” | Network lock (SIM lock) restriction or foreign carrier subsidy lock active on firmware | iOS: Android: | Request an unlock code from original carrier; verify device is not blacklisted via IMEI. |
| Calls/SMS work, but mobile data shows disconnected | Missing, damaged, or misconfigured Access Point Name (APN) routing protocols | Settings > Network & internet > SIMs > Access Point Names | Reset APN settings to default or manually reconstruct carrier APN with correct MCC/MNC values. |
1. Inspect Physical Gold Pins, Oxidation, and Tray Seating
Physical SIM cards communicate using six or eight contact points carrying VCC (power), RST (reset), CLK (clock), GND (ground), VPP (programming voltage), and I/O data lines. Even invisible surface grease or micro-abrasions can interrupt the low-voltage (1.8V or 3V) circuit between the phone’s spring-loaded pins and the card.
Power down your smartphone completely (never hot-swap a SIM card while the OS is writing network tables).
Eject the SIM tray using a standardized ejector tool pressed straight into the release pinhole.
Inspect the gold contact array under direct light:
Look for dirt, pocket lint, or dark oxidation patches on the gold pads.
Clean the contacts gently using a lint-free microfiber cloth dampened with 99% isopropyl alcohol (or lightly buff the surface using a soft pencil eraser to remove chemical oxidation). Let it air-dry completely.
Check the SIM tray for physical warping:
If the plastic card wobbles or sits unevenly in the tray, the internal spring pins inside the phone cannot maintain uniform contact pressure.
If the SIM card is loose, placing a small square of thin paper (not cardboard or tape) on the non-chip back side can restore firm mechanical contact against the internal reader pins.
2. Verify Baseband Chipset Health and Force a Radio Reset
If the phone’s internal baseband modem crashes, it stops polling the SIM slot entirely. Before assuming the SIM card is dead, verify that the operating system can still talk to its own cellular radio hardware.
Step A: The Hardware IMEI Integrity Check
Open your phone’s default phone dialer and enter:
*#06#
If one or two 15-digit IMEI numbers appear on-screen: The baseband modem and internal cellular hardware are functional. The issue is strictly isolated to the SIM card, reader contacts, or carrier provisioning.
If the screen returns blank, shows “Null/Null”, or throws an error: The phone’s baseband firmware has crashed or the motherboard modem chip has suffered hardware failure. The phone will need a system firmware re-flash or motherboard service.
Step B: Access the Android Radio Diagnostic Menu
On most stock and Qualcomm-based Android devices, you can query the hardware radio directly:
Open the phone dialer and enter:
*#*#4636#*#*Tap Phone information.
Locate the toggle labeled Mobile Radio Power.
Turn it Off, wait 10 seconds, and turn it back On.
Check Set Preferred Network Type and ensure it includes your target network (e.g., NR/LTE/GSM/WCDMA).
3. Reset the Network Stack and Carrier Handshake Cache
Corrupted cellular routing tables, conflicting Wi-Fi calling profiles, or damaged network cache files can prevent the operating system from authenticating the card on cell towers.
On Android:
Open
Settings.Navigate to
System>Reset options(orGeneral management>Reset).Tap Reset Mobile Network Settings (or Reset Wi-Fi, mobile & Bluetooth).
Tap Reset Settings and enter your PIN.
Reboot the phone immediately after the reset completes.
[Settings]
 └── System (or General Management)
      └── Reset options
           └── Reset Mobile Network Settings
On Apple iOS:
Open
Settings.Tap
General>Transfer or Reset iPhone.Tap
Resetat the bottom of the screen.Select Reset Network Settings and enter your passcode.
The device will restart and purge all cellular leases, carrier profile caches, and saved Wi-Fi connections.
4. Fix APN Configurations and Carrier Provisioning Errors
If your SIM card is detected (signal bars appear) but calls fail or mobile data shows “Disconnected,” the Access Point Name (APN) database has become misaligned with your network’s core data gateway.
Go to
Settings>Network & internet>SIMs(orConnections>Mobile networkson Samsung).Tap Access Point Names.
Tap the three dots in the top-right corner and select Reset to default.
If the list is empty or the carrier name is incorrect, tap Add (+) to manually build a profile using your carrier’s exact specifications:
Name: Carrier Name (e.g., T-Mobile US LTE, Vodafone Internet)
APN: Your carrier’s specific gateway (e.g.,
fast.t-mobile.com,wholesale, orinternet)MCC / MNC: Do not change these numbers manually—they must match the carrier code embedded in your physical SIM.
APN type: Enter
default,supl,mmsAPN protocol: Set to
IPv4/IPv6
Save the APN, select it as the active profile, and toggle Airplane Mode on and off to register the new data bearer.
5. Resolve eSIM Conflicts and Profile Desynchronization
When switching between physical SIMs and eSIMs, or when running a Dual-SIM setup, operating systems can lock the radio to a dormant profile, disabling the physical card.
Go to
Settings>Cellular(iOS) orSettings>Network & internet>SIMs(Android).Check your active lines:
If both an eSIM and a physical SIM are configured for the same slot or carrier, temporarily toggle the eSIM Off.
Toggle the physical SIM Off, wait 5 seconds, and toggle it back On to force an IMSI re-read.
If using an eSIM that reports “No Service” or “eSIM Not Working”:
Verify your EID number under
Settings > General > About(iOS) orSettings > About Phone > SIM Status(Android). If the carrier does not have your correct 32-digit EID mapped to the eSIM profile on their server, provisioning will never complete.Never delete an eSIM profile without having a new activation QR code ready from your carrier; deleting it erases the digital encryption keys locally.
6. The Cross-Device Isolation Test
To establish whether the failure lies within the phone or the SIM card itself, run a two-way swap test using a secondary unlocked phone:
Test A: Insert your SIM card into another working smartphone.
Result: If the second phone also shows “No SIM” or “Invalid SIM,” the microchip inside the SIM card has suffered internal electrostatic discharge (ESD) or the carrier has permanently deactivated that ICCID. The only fix is obtaining a physical replacement SIM from your carrier.
Test B: Insert a known working SIM card from another phone into your device.
Result: If your phone refuses to read a known working SIM card while the IMEI is intact, the internal SIM reader pin assembly on your phone’s motherboard is bent, broken, or suffering from a fractured solder joint, requiring hardware repair or an external conversion to eSIM.