
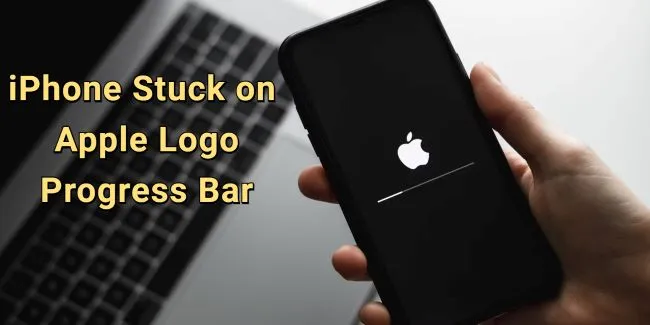
How to Fix an iPhone Stuck on the Apple Logo with a Loading Bar
An iPhone stuck on the Apple logo with a progress or loading bar indicates that the device has halted during an operating system installation, an over-the-air (OTA) delta update, an APFS snapshot verification, or a local data migration. During this phase, the low-level bootloader (iBoot) hands execution to the kernel to write firmware updates to the NAND flash, reorganize the /private/var user data partition, or update baseband and Secure Enclave coprocessor microcode.
When the progress bar freezes for more than an hour—or loops endlessly—the stall is typically caused by insufficient free NAND storage preventing file decompression, a corrupted system update package, filesystem index degradation, or a hardware short on the ambient light/proximity sensor flex cable stalling the I2C data bus during peripheral power-on self-tests.
Quick Diagnostic Matrix
| Symptom | Root Cause | Inspection / Tool | Recommended Fix |
| Bar frozen at 0% or ~99% for over 60 minutes | APFS filesystem seal verification stall or corrupted delta update package | Hardware Buttons | Execute a Force Restart; if it re-enters the bar, connect to a PC/Mac. |
| Stall occurred during an update with low storage (< 2 GB free) | NAND out-of-space lockup (iOS Error 1110 / filesystem container starvation) | Finder / Apple Devices App | Attempt a non-destructive Update via Recovery Mode; DFU restore if failed. |
| Progress bar reboots in a loop every 2–5 minutes | Kernel panic during boot initialization (broken baseband or sensor link) | Console Panic Logs | Boot into Recovery Mode; reinstall iOS firmware using IPSW file. |
| Bar freezes after screen/battery replacement or liquid exposure | Short circuit on the front receiver/earpiece speaker flex cable (I2C bus hang) | Physical Teardown | Disconnect the front display flex cable; test boot without the ear speaker assembly. |
| PC detects phone, but Finder reports Error 9, 4013, or 4014 | Corrupted USB packet transit or failing NAND flash memory rail | MFi USB Cable & Port | Swap to an authentic USB-C/Lightning cable; plug into rear motherboard port. |
1. Differentiate Between an Active Task and a Frozen State
Before interrupting the device, confirm whether the installation is genuinely deadlocked. During major iOS upgrades (such as migrating between major version milestones) or restoring encrypted local backups containing hundreds of gigabytes of media, the progress bar may appear motionless for an extended duration while processing background encryption keys.
[iPhone Front Glass]
┌──────────────────────────────────────┐
│ │
│ │ <── Apple Logo (iBoot Execution)
│ │
│ [▓▓▓▓▓▓▓░░░░░░░░░░] │ <── Progress Bar (NAND Flash Writes)
│ │
└──────────────────────────────────────┘
├── Active: Bar moves by single pixels over 30 mins; device is slightly warm.
└── Stalled: No movement for > 60 mins, or cold chassis with zero peripheral recognition.
The 60-Minute Baseline: Allow at least 60 minutes if you initiated a major update or iCloud/local transfer.
The Visual Test: Place the tip of a piece of paper or make a tiny dry-erase dot directly against the glass at the leading edge of the progress bar. Leave the phone undisturbed for 20 minutes. If the line advances even a fraction of a millimeter, the NAND storage controller is actively writing files; do not interrupt power.
The Host Test: Connect the iPhone to a Mac or a PC with the Apple Devices app (or iTunes). If the computer detects the device and reports “iPhone is updating…”, let the background sync finish uninterrupted.
2. Execute a Hardware-Level Force Restart
If the device is completely unresponsive, a standard slide-to-power-off cannot be performed. A hardware-level force restart cuts power to the CPU registers and clears corrupted execution loops from volatile memory (LPDDR RAM) without touching your permanent data.
[Force Restart Sequence (iPhone 8, X, 11, 12, 13, 14, 15, 16 & SE 2nd/3rd Gen)]
 1. Quick-press and release [Volume Up]    ──► (+)
 2. Quick-press and release [Volume Down]  ──► (-)
 3. Press and hold [Side / Power Button]    ──► Hold continuously for 10–15 seconds
                                                (Do not release until the Apple Logo re-appears)
iPhone 8, SE (2nd/3rd Gen), and All Models with Face ID (iPhone X through iPhone 16 Series):
Press and immediately release the Volume Up button.
Press and immediately release the Volume Down button.
Press and hold the Side (Power) button.
Continue holding the Side button through the screen shutting off. Only release it when the Apple logo re-appears on a black background.
iPhone 7 and iPhone 7 Plus:
Press and hold both the Volume Down button and the Sleep/Wake (Side) button simultaneously for at least 10 seconds until the Apple logo appears.
iPhone 6s, 6s Plus, and iPhone SE (1st Gen):
Press and hold both the Home button and the Top (or Side) button simultaneously until the screen cycles off and the Apple logo displays.
3. Reinstall iOS Firmware via Recovery Mode (Preserve Data)
If a force restart returns immediately to the frozen progress bar, the system partition (/System) is partially written or damaged. You can reinstall the core operating system files via Recovery Mode using the “Update” command. This flashes a clean copy of iOS over the system files while leaving your apps, photos, and personal data intact in the /private/var user space.
[Enter Recovery Mode]
 1. Connect iPhone to Mac / PC via certified USB cable.
 2. Execute Force Restart key sequence (Vol Up > Vol Down > Hold Side).
 3. DO NOT RELEASE the Side button when the Apple logo appears.
 4. KEEP HOLDING until the "Connect to Computer" screen displays.
[Computer Display (Finder / Apple Devices / iTunes)]
 ┌────────────────────────────────────────────────────────────────────────┐
 │ There is a problem with the iPhone that requires it to be updated or   │
 │ restored.                                                              │
 │                                                                        │
 │       [Cancel]               [Restore]               [Update]          │
 └──────────────────────────────────────────────────────────▲─────────────┘
                                                            │
                                  CRITICAL: Select "Update" to keep your data intact!
Connect your iPhone to a computer running the latest version of macOS (Finder) or Windows (with the Apple Devices app or iTunes open) using a verified data cable.
Put the phone into Recovery Mode:
Quick-press Volume Up, quick-press Volume Down, then press and hold the Side button.
Keep holding past the Apple logo until the screen shows a computer monitor/cable graphic with the URL
[support.apple.com/restore](https://support.apple.com/restore).
Look at your computer screen. A prompt will state: “There is a problem with the iPhone that requires it to be updated or restored.”
Click Update (do not click Restore).
The computer will download the full IPSW firmware image (typically 6 GB to 8 GB).
Note: If the download takes longer than 15 minutes, the iPhone will automatically exit Recovery Mode and return to the frozen screen. Let the download finish on your computer, then repeat Step 2 to put the phone back into Recovery Mode and click Update again.
The computer will reflash the operating system. Once complete, the phone will reboot with a fresh progress bar that advances smoothly to the Lock Screen.
4. Resolve “Storage Full” Deadlocks (iOS Error 1110)
If your iPhone ran out of storage before initiating the update (or displayed a “Storage Almost Full” warning prior to crashing), the system is locked in an Error 1110 bootloop. During boot, iOS attempts to mount the APFS container and create temporary system cache structures; without sufficient scratchpad space on the NAND flash, the operating system kernel panics and freezes the loading bar.
[APFS Container Storage Starvation]
 ┌────────────────────────────────────────────────────────┐
 │ Available NAND Flash Storage Block                     │
 │ ┌─────────────────────────┐  ┌───────────────────────┐ │
 │ │ System OS Volume        │  │ User Data Partition   │ │
 │ │ (Read-Only Signed Root) │  │ (/private/var)        │ │
 │ └─────────────────────────┘  └───────────────────────┘ │
 │ ░░░░░░░░░░░░░░░░░░░░░░░░░░░░░░░░░░░░░░░░░░░░░░░░░░░░░░ │
 │ [FREE SPACE: 0 MB] ──► APFS Snapshot Cannot Finalize   │
 └────────────────────────────────────────────────────────┘
Attempt Repeated Recovery Updates: Connect to a computer and attempt the Recovery Mode Update process described in Section 3 up to three consecutive times. In some builds of iOS, subsequent update passes trigger built-in storage-clearing scripts that delete temporary update caches (
/var/MobileSoftwareUpdate) to free up enough megabytes to complete the boot.Third-Party Repair Suites: Software utilities like Tenorshare ReiBoot or 3uTools feature specific “Retain User Data” repair routines designed to clear temporary system logs and caches during the firmware injection phase, occasionally freeing up the few hundred megabytes required to escape the Error 1110 cycle.
If Updates Fail Consistently: If the computer repeatedly terminates with Error 1110, the APFS metadata table has broken due to complete allocation exhaustion. In this scenario, preserving local data is no longer possible; the NAND partition must be wiped clean via a DFU Restore (Section 5).
5. Execute a Clean DFU Mode Restore (Factory Reset)
If the filesystem is permanently corrupted, or if an Update via Recovery Mode throws persistent errors (Error 9, 4013, 14), you must bypass the standard bootloader entirely and initiate a Device Firmware Update (DFU) restore.
Warning: A DFU restore permanently erases all photos, apps, and settings on the device, returning it to factory-fresh status. Use this step only if Recovery Mode Update fails or your data is backed up to iCloud/computer.
[DFU Mode Timing Sequence (iPhone 8 / X / 11 / 12 / 13 / 14 / 15 / 16)]
 1. Connect phone to computer.
 2. Quick-press [Vol Up], quick-press [Vol Down].
 3. Press and hold [Side Button] for 10 seconds.
 4. WHILE holding [Side Button], press and hold [Vol Down] for 5 seconds.
 5. Release [Side Button], continue holding [Vol Down] for 10 seconds.
 (Screen MUST remain COMPLETELY BLACK; Computer alerts "Device Detected in Recovery")
Connect your iPhone to your Mac or PC using an authentic cable.
Follow the exact timing steps outlined above:
If the Apple logo appears, you held the Side button too long; restart from Step 2.
If the “Connect to Computer” (Recovery) screen appears, you held Volume Down too long; restart from Step 2.
The screen must remain completely black while the computer displays a notification that an iPhone in recovery mode has been detected.
In Finder or iTunes/Apple Devices, select Restore iPhone.
The computer will re-partition the flash storage, rebuild the APFS container tables from scratch, and flash a pristine factory image of iOS.
6. Diagnose Hardware Faults: The Front Sensor Flex Short (I2C Bus Hang)
If an iPhone (most notably iPhone X, XR, XS, 11, 12, 13, and 14 series) freezes on the Apple logo with a loading bar immediately after an impact, a screen replacement, or exposure to moisture/sweat, the fault is frequently hardware-related, not software.
[Display Assembly Internal Wiring]
 ┌────────────────────────────────────────────────────────┐
 │ OLED Display Panel                                     │
 └──────────────────────────┬─────────────────────────────┘
                            │ (Main Display Flex)
               ┌────────────┴────────────┐
               │ Motherboard Main Logic  │ ──► [Boots Normally]
               └────────────┬────────────┘
                            │ (Front Sensor Assembly Flex)
            ┌───────────────┴───────────────┐
            │ [Earpiece Speaker / Proximity]│ <── LIQUID / SHORT CIRCUIT
            │ [Flood Illuminator / ALS     ]│     Pulls I2C2 Data Line LOW!
            └───────────────────────────────┘            │
                                                         ▼
                                       [KERNEL HANGS ON LOADING BAR]
The Mechanism: The upper flex cable assembly folded inside the display housing contains the earpiece speaker, ambient light sensor (ALS), proximity sensor, and TrueDepth flood illuminator. These peripherals communicate with the application processor over the
I2C(Inter-Integrated Circuit) serial communication bus.The Failure: Moisture entering the earpiece grill corrodes the ambient light sensor or proximity sensor pins, shorting the
I2Cclock (SCL) or data (SDA) line to ground. When iOS boots, the kernel queries all hardware peripherals during the progress bar phase. Because the shortedI2Cline cannot return a response, the boot sequence stalls indefinitely.The Diagnostic Isolation:
Open the iPhone chassis (or take it to a qualified hardware repair technician).
Unplug the front sensor/earpiece speaker assembly flex cable from the logic board, leaving only the main display and battery connected.
Power on the phone.
If the iPhone boots smoothly past the loading bar to the Lock Screen in under 30 seconds, the front sensor assembly is shorted. Replacing the upper flex cable (or ultrasonic-cleaning the original sensor to retain Face ID functionality) completely resolves the issue.
If the iPhone continues to freeze on the loading bar across multiple computers, rejects a full DFU restore with low-level errors (such as Error 4013 or Error 9), and fails to boot even with all secondary display peripherals disconnected, the storage hardware itself has failed. This points to cracked solder balls beneath the primary NAND flash IC, a failing Baseband Power Management IC (BBPMIC), or broken motherboard interposer sandwich traces following a chassis bend or drop, which requires board-level micro-soldering to recover.