
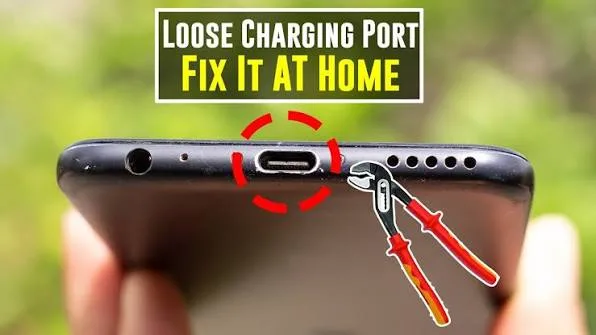
How to Fix a Phone Charger Port Not Working
A failing phone charger port is almost always caused by compacted pocket lint preventing physical plug seating, micro-arcing carbon deposits on the VBUS or CC (Configuration Channel) pins, an erroneous capacitive moisture-detection flag, or cracked solder joints on the USB-C or Lightning daughterboard. When a phone refuses to charge, charges only at an angle, or repeatedly connects and disconnects, isolating mechanical obstructions from electrical pin failure resolves the issue without unnecessary component replacement.
Quick Diagnostic Matrix
| Symptom | Root Cause | Setting / Diagnostic Path | Recommended Fix |
| Cable falls out easily or charges only when bent upward | Compressed pocket lint compacted into the bottom dead-space of the port | Visual inspection with flashlight | Clean the cavity using a non-conductive wooden toothpick or plastic pick. |
| “Moisture detected in charging port” persistent alert | Conductive mineral residue bridging sense pins or a stuck OS cache flag | Android: Settings > Apps > USB Settings | Clear USB cache partition; flush port with 99% isopropyl alcohol to displace residue. |
| Charges via USB-A to USB-C, but fails with USB-C to USB-C | Blown or severed CC (Configuration Channel) pin preventing USB-PD handshake | Hardware protocol check | Replace damaged cable; clean CC pins inside the port; test with a legacy 5V adapter. |
| No charging indication; port has excessive physical wobble | Fractured surface-mount solder joints connecting port to the daughterboard | Physical wiggle test / USB ammeter | Replace the modular USB daughterboard assembly or resolder fractured port anchors. |
1. Extract Compacted Pocket Lint and Debris
Over 80% of intermittent charging issues stem from pocket lint compacted into the bottom of the port cavity by repeated cable insertions. When lint accumulates, the metal housing of the charging cable cannot penetrate deep enough for the internal locking springs to engage the port’s retention notches, leaving the data and power pins slightly out of alignment.
[Port Cross-Section]
 ┌──────────────────────────────┐
 │ [Pin Array]                  │
 │ ░░░░░░░░░░░░░░░░░░░░░░░░░░░░ │ <─── Compacted Lint / Dust Barrier
 └──────────────────────────────┘      (Prevents full connector depth)
- Power off the phone completely.
- Shine a bright, direct flashlight straight into the charging port.
- Inspect the depth: you should clearly see the plastic/metal backstop plate at the very rear of the port. If the floor of the port appears gray, fuzzy, or uneven, lint is present.
- Use the correct tool: Take a non-conductive wooden toothpick, shave it flat with a razor blade to create a thin edge, or use a fine plastic dental flosser pick. Never use metal needles, safety pins, or paperclips, as they can bend the central pin tongue or short out the battery supply rail.
- Insert the pick flat against the bottom edge and gently sweep along the base from one side to the other, hooking and dragging out the compacted lint.
- Blow out remaining loose debris using a short burst of compressed air held upright.
- Re-insert the charging cable. The connector should slide all the way in with a distinct, tactile mechanical “click,” leaving no gap between the cable head and the phone chassis.
2. Clean Pin Oxidation and Carbon Arcing Deposits
Modern high-wattage fast chargers (25W–120W) run significant current through small contact surfaces. Hot-plugging a cable under load can create micro-arcs that leave black carbon traces or green copper oxidation across the power delivery contacts (such as Pin 4 on Lightning or the outer VBUS pins on USB-C), breaking electrical conductivity.
- Turn off your device.
- Inspect the internal pins under magnification:
- USB-C: Look at the delicate central wafer (tongue) containing 24 microscopic contact pads.
- Lightning: Look at the bottom spring pins inside the roof and floor of the port cavity.
- Lightly dampen an interdental brush or a thin strip cut from an index card with 99% isopropyl alcohol (IPA). Do not use standard 70% rubbing alcohol, as the 30% water content promotes long-term electrochemical corrosion.
- Carefully insert the brush or card into the port, lightly scrubbing the surface of the pins to dissolve carbon residue and flux deposits.
- Allow the alcohol to evaporate completely for 10 minutes before applying power.
3. Clear False “Moisture Detected” Sensor Flags
Modern smartphones utilize capacitive sensing pins inside the port to measure impedance between ground and signal lines. If moisture, salt, or sweat bridges these pins, the system disables the charging circuit to prevent galvanic corrosion. However, the software daemon managing this state often becomes locked in a false-positive loop long after the port has dried.
Step A: Purge the USB Cache (Android / Samsung)
- Navigate to
Settings>Apps. - Tap the filter/sort icon next to “Your apps” and toggle on Show system apps.
- Scroll down and select USB Settings (or Android System).
- Tap Storage, then tap Clear Cache followed by Clear Data.
- Restart the device.
[Settings]
 └── Apps > [Enable "Show system apps"]
      └── USB Settings
           └── Storage > [Click] "Clear Data" & "Clear Cache"
Step B: The Bootloader Plug Trick
If the phone is dead and will not boot past the moisture warning screen:
- Plug the charger into the wall outlet.
- Plug the USB cable into the phone. The moisture warning icon will illuminate.
- Immediately press and hold the Power + Volume Down buttons to force a hard reboot.
- Continue holding the buttons through the initial reboot until the carrier or OS logo appears; the bootloader will often bypass the sensory polling check during this hardware-level restart.
4. Test USB-PD Handshakes and Cable Orientation
USB-C ports do not deliver power by default. When a USB-C charger is plugged in, the CC (Configuration Channel) pins must establish a two-way digital handshake to determine cable orientation and negotiate charging voltage (e.g., 5V, 9V, 15V, 20V) via the USB Power Delivery (USB-PD) protocol.
- The Orientation Test: Plug your USB-C cable in. If the phone does not charge, flip the cable head 180 degrees and insert it again. If it charges in one orientation but not the other, one side of the central wafer’s CC pins or data lines is mechanically bent, oxidized, or severed.
- The USB-A Isolation Test: Test charging with a legacy USB-A to USB-C cable connected to a standard 5V wall block. USB-A cables utilize a fixed internal 56kΩ pull-up resistor that bypasses active digital PD negotiation, forcing the phone to accept baseline 5V power. If a USB-A cable charges the phone but a USB-C to USB-C cable fails completely, the port’s CC handshake circuitry is dead.
5. Toggle Fast Charging Protocols and Calibrate Battery Profiles
Buggy power-management profiles in the operating system can cause the charging controller to abort charging cycles when stepping up to high-voltage PPS (Programmable Power Supply) states.
- Open
Settings>Battery(orDevice Care>Battery). - Navigate to More battery settings or Charging settings.
- Toggle off Fast charging, Super fast charging, and Fast wireless charging.
- Plug in your charger. If the phone charges reliably at standard 5V/2A speeds, the high-voltage step-up buck converter on the main logic board is failing or rejecting the charger’s voltage negotiation.
- If the battery is reporting 0% and refusing to accept current, leave the phone on a low-power (5V 1A) charger for 45 minutes undisturbed to revive cells that have dropped below minimum cut-off voltage thresholds before attempting fast charging.
6. Diagnose Physical Solder Joint Fatigue & Hardware Replacement
If your charging cable physically shifts from side to side or requires upward pressure to sustain a connection, the failure is physical:
- Internal Pin Tongue Breakage: If the central wafer inside a USB-C port has snapped or cracked down the middle, inserting a plug can cross 5V/9V lines to ground, creating an immediate short-circuit hazard. The port must not be used again until repaired.
- Fractured Daughterboard Solder Joints: In most modern smartphones, the charging port is surface-mounted onto an independent charging daughterboard (sub-board) linked to the main logic board via a flat flexible printed circuit (FPC) cable. Over time, physical stress fractures the solder points securing the port anchors to the PCB.
Because replacement sub-boards are modular, repairing a physically loose or dead port rarely requires soldering on modern devices. An inexpensive OEM daughterboard swap—replacing the entire lower PCB assembly housing the USB-C port, lower microphone, and antenna traces—permanently restores full fast-charging and data-transfer capabilities.