
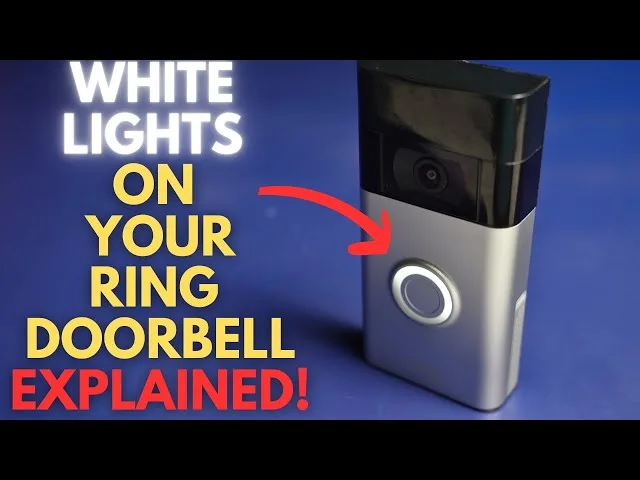
How to Fix What Does Solid White Light On Ring Doorbell Mean
On Ring video doorbells, a solid white light primarily indicates that the device is in Idle Mode—it is hardwired to a continuous AC power source, connected to the local Wi-Fi network, and standing by to detect motion or register a button press.
Quick Diagnostic Matrix
| Symptom | Root Cause | Setting / Diagnostic Path | Recommended Fix |
| Doorbell works normally, but white ring stays lit 24/7 | Normal design behavior: continuous hardwire power illuminates the standby LED ring | Normal Operation / Standby | No repair needed. This is normal idle mode for hardwired Ring models and cannot be disabled in software. |
| Solid white light on, but doorbell is “Offline” and unresponsive | Internal SoC crash, memory freeze, or incomplete post-update initialization | Ring App > Device Health | Perform a 20-second hard button reset to clear corrupted SRAM cache. |
| White light on, but unit drops offline whenever the button is pressed | Transformer voltage drop (brownout); unable to handle peak current draw during ringing | Multimeter / Transformer Rating | Upgrade doorbell transformer to a minimum of 16V AC at 30VA; inspect Pro Power Kit. |
| White light stuck on during initial installation setup | Failed initial Wi-Fi handshake or incomplete firmware update sequence | Setup Button / Wi-Fi Router | Press the setup button once to re-enter setup mode; split router bands to pure 2.4 GHz. |
| Mechanical chime buzzes/hums while white ring glows | Stray current bleeding through the mechanical chime coil without a bypass jumper | In-home Chime Box | Install the Jumper Cable (Doorbell Wired) or Pro Power Kit (Doorbell Pro). |
1. Understand What Solid White Light Means (Normal vs. Frozen)
Before disassembling hardware, verify whether your doorbell is malfunctioning or operating as intended:
- Ring Video Doorbell Wired, Pro, and Pro 2: These models lack internal battery reserves for standalone operation and rely entirely on constant transformer power. When receiving adequate voltage and connected to your network, the central LED ring glows with a soft, steady solid white light. This serves as an ambient night locator and confirms the device is in Idle / Ready state.
- Ring Battery Models Hardwired for Trickle Charging: A solid white light confirms that external AC power is detected and maintaining battery charge.
- When It Requires a Fix: If the light is solid white but the Ring app reports “Device Offline”, the video stream fails to load, motion alerts do not trigger, or the physical button produces no sound, the operating system is locked in an infinite idle loop or has brownout-stalled.
2. Perform a 20-Second Hardware Reset
If the doorbell is frozen with a solid white ring and does not respond to physical button presses, the onboard microcontroller has encountered a kernel lockup. Resetting the device flushes the volatile memory registers without altering physical wiring.
[Ring Doorbell Faceplate Removed]
 └── Locate Setup Button (Side or Rear depending on model)
      └── Press and Hold Setup Button for 20-30 Seconds
           └── Release Button > Watch LED Flash Blue/White
                └── Wait 2 Minutes for Firmware Initialization
- Remove the security screw at the bottom of the Ring Doorbell using your specialized star-shaped screwdriver, then pull off the faceplate.
- Locate the Setup Button:
- Ring Pro / Pro 2 / Wired: A small button located on the right or left edge of the housing.
- Ring Battery Models (1st/2nd Gen, 3, 4, Plus): An orange button located on the rear or underneath the faceplate.
- Press and hold the setup button continuously for 20 to 30 seconds.
- Release the button. The LED ring will flash blue several times, indicating that the unit is executing a factory reboot.
- Wait 2 full minutes for the hardware to reload its operating system.
- If the reset is successful, the light will begin spinning white, signaling that it has entered Setup Mode and is ready to reconnect to your app.
3. Power Cycle the Circuit Breaker to Clear Flea Power
Low-voltage doorbell circuits contain filter capacitors that maintain charge across the transformer lines. If a transient electrical surge locks the doorbell’s power-management chip, cycling line power forces a cold boot.
- Locate your home’s main electrical breaker panel.
- Switch off the circuit breaker labeled Doorbell (or the corresponding hallway/transformer lighting circuit).
- Verify that the solid white light on the Ring Doorbell goes completely dark.
- Leave the power disconnected for 60 seconds to allow all residual electrical charge (“flea power”) to bleed from the doorbell’s internal step-down power rails.
- Flip the breaker back to the ON position.
- The doorbell will initialize its bootloader: the light will flash briefly, calibrate its sensors, and reconnect to your Wi-Fi network.
4. Diagnose Transformer Voltage and Brownout Sags
A Ring Doorbell that displays a solid white ring while idle but crashes, freezes, or disconnects when the button is pressed is suffering from a voltage brownout. Idle operation requires minimal power ($<2text{W}$), but activating the IR night-vision LEDs, Wi-Fi radio transmission, audio speaker, and mechanical chime circuit simultaneously causes a momentary current spike. If the transformer cannot sustain the load, the device stalls in an undefined low-power state.
[Standard House AC: 120V/240V] ──► [Doorbell Transformer] ──► [Multimeter Test at Terminals]
                                                                     │
           ┌─────────────────────────────────────────────────────────┴────────────────────────────────┐
           ▼                                                                                          ▼
 [Under 16V AC / Under 30VA]                                                          [16V–24V AC at 30VA–40VA]
  └── Brownout Risk (Doorbell Freezes / Code Stalls)                                    └── Sufficient Operating Power
Step A: Check In-App Voltage Telemetry
- Open the Ring app on your mobile device.
- Tap the three-line menu icon (
☰) > Devices > select your Doorbell. - Tap Device Health.
- Check Transformer Voltage (or Power Output):
- Good / 16V–24V AC: Operating within acceptable parameters.
- Poor / Very Poor ($<15text{V AC}$): The transformer is undersized or dying, causing the device to lock up.
Step B: Physical Terminal Voltage Measurement
- Unscrew the Ring Doorbell from the wall mounting bracket to expose the two terminal screws on the back.
- Set a digital multimeter to measure AC Voltage ($text{V}sim$).
- Place one probe on each terminal screw while the wires remain connected under load:
- Ring Video Doorbell Pro / Pro 2: Requires 16V to 24V AC at a minimum of 30VA.
- Ring Video Doorbell Wired: Requires 8V to 24V AC at a minimum of 10VA to 40VA.
- If the reading drops below $16text{V AC}$ on a Pro model, replace your transformer with a standard $16text{V AC} / 30text{VA}$ residential doorbell transformer.
5. Verify In-Home Chime Bypass (Pro Power Kit / Jumper Cable)
Connecting a hardwired Ring Doorbell to an existing mechanical or digital chime without the required bypass hardware causes erratic voltage drops and stray current feedback that lock the doorbell in a permanent solid white state.
[Mechanical In-Home Chime Box]
 ┌───────────────────────────────────────────────┐
 │   TRANS Terminal        FRONT / REAR Terminal │
 │         │                        │            │
 │         └─── [ Jumper / Power Kit ] ──┘       │ <── Bypasses chime solenoid
 └───────────────────────────────────────────────┘     (Prevents voltage leaks)
- For Ring Video Doorbell Wired: You must bypass your internal chime entirely. Remove the cover of your home chime box, locate the
TRANSandFRONTscrew terminals, disconnect the existing wires, and bridge them using the included orange Jumper Cable. This provides an uninterrupted, direct power path to the doorbell and stops the chime coil from siphoning voltage. - For Ring Video Doorbell Pro / Pro 2: Ensure the Pro Power Kit v2 is wired across the
TRANSandFRONTterminals inside your chime box. If the selector switch on the Pro Power Kit is set improperly or omitted, the internal circuitry will back-feed voltage, locking the doorbell’s status LEDs.
6. Force Re-Pairing via Setup Mode
If the solid white light persists because the device failed an automatic over-the-air (OTA) firmware upgrade or dropped out of your router’s DHCP table, forcing the unit back into setup mode re-provisions the network stack.
- Press the Setup Button once firmly and release it immediately (do not hold it down).
- The solid white light should switch to a spinning white light.
- In the Ring app, tap Device Health > Reconnect to Wi-Fi (or Change Wi-Fi Network).
- Follow the on-screen instructions to join the temporary
Ring-xxxxxxad-hoc network and re-enter your home Wi-Fi credentials. - Network Frequency Check: Ensure your doorbell connects to an uncrowded 2.4 GHz network. While Pro models support 5 GHz, 2.4 GHz provides substantially better propagation through exterior brick, stucco, and aluminum siding, preventing wireless packet starvation that locks the device UI.
If your Ring Doorbell remains frozen with a solid white light after testing your transformer at $ge 16text{V AC}$, verifying chime bypass wiring, and attempting a 30-second button reset, the device’s internal flash storage (eMMC) has suffered permanent read/write corruption during a failed firmware write. In this state, the bootloader cannot mount the root filesystem, requiring a hardware warranty replacement from Ring Support.