
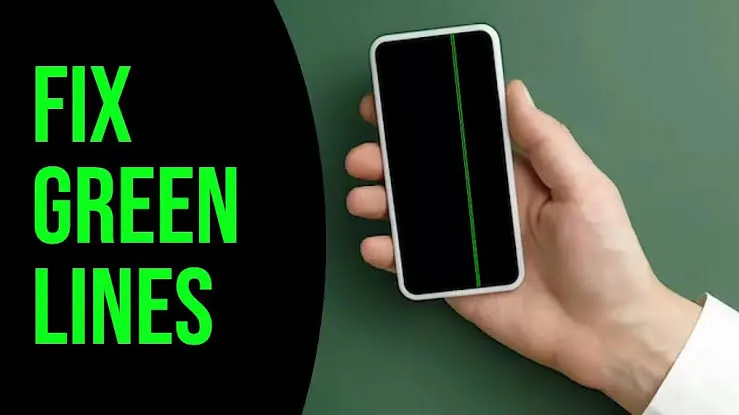
How to Fix a Green Line on a Phone Screen
A persistent, razor-thin vertical or horizontal green line on a smartphone screen indicates an electrical hardware failure across the display panel’s Chip-on-Film (COF) or Chip-on-Glass (COG) bonding interface. On AMOLED and OLED panels, columns of subpixels are addressed by microscopic signal traces anchored with Anisotropic Conductive Film (ACF). When localized heat (frequently generated during intensive OS firmware updates), physical shock, or manufacturing adhesive degradation fractures these microscopic traces, the data line to that specific column loses control logic and shorts to the high-voltage supply rail ($V_{DD}$ / $V_{GH}$). Because green subpixels feature the highest luminous efficiency and lowest forward voltage threshold in modern Diamond PenTile matrix layouts, the line latches permanently to 100% full saturation.
Quick Diagnostic Matrix
| Symptom | Root Cause | Inspection / Diagnostic Tool | Recommended Fix |
| Line invisible in screenshots viewed on another device | Physical subpixel column driver or ACF bonding failure | Screenshot Capture Test | Hardware issue. File for an OEM screen replacement program or perform a display swap. |
| Line appeared immediately after a major OS update | Thermal expansion shearing delicate flex bonding traces near the bottom bezel | Hardware Revision / Thermals | Request an out-of-warranty OEM safety/courtesy repair (Samsung, OnePlus). |
| Line flickers or changes color when pressing the bezel | Intermittent contact loss on the flexible printed circuit (FPC) joint | Lower Display Chin Pressure | Professional laser bonding repair or complete OLED display assembly replacement. |
| Multiple colored lines (green, pink, white) spreading | Progressive delamination of the Anisotropic Conductive Film (ACF) | Screen Diagnostic Menu (*#0*#) | Full OLED screen replacement required; backup data immediately before panel blacks out. |
| Line appears on captured screenshots and screen recordings | Software framebuffer corruption or GPU rendering artifact | Safe Mode / Factory Reset | Wipe cache partition; perform a clean factory firmware flash via Odin/Fastboot/DFU. |
1. Execute the Screenshot Verification Test
Before attempting software resets or seeking warranty repairs, determine whether the failure is rendered in the software framebuffer (GPU/OS) or confined to the physical display glass:
[Take Screen Capture (Power + Vol Down)]
                   │
                   ▼
[Send Image to Another Phone / PC or Open in Photo Editor]
                   │
       ┌───────────┴───────────┐
       ▼                       ▼
[Line IS Visible on PC]   [Line DISAPPEARS on PC]
  └── GPU / Software Bug    └── Physical Hardware Failure
       (Proceed to Sec. 3)       (Proceed to Sec. 2, 4 & 5)
Capture a screenshot of your screen (typically by pressing Power + Volume Down simultaneously).
Transfer that screenshot to another device (such as a laptop, tablet, or secondary phone) via cloud storage, messaging apps, or email.
Inspect the image on the secondary display:
If the green line is absent on the second device: The GPU, operating system, and framebuffer are functioning normally. The defect is 100% isolated to the physical OLED panel hardware, driver IC, or flex bonding.
If the green line appears in the screenshot file: The issue is a rare software glitch or GPU driver artifact. Proceed to Section 3.
Hardware Diagnostic Dial Codes
Samsung Galaxy: Open the Phone dialer and enter
*#0*#. Tap RED, GREEN, and BLUE tiles. If the line remains visible across all primary color test patterns, the hardware driver is shorted.Xiaomi / Poco: Dial
*#*#6484#*#*to enter the CIT hardware diagnostic menu and run the Display test.
2. The Physical Root Cause: ACF Bonding and Thermal Shearing
Many users report green lines appearing immediately following an over-the-air (OTA) software update. While this makes the problem look like a software bug, the update is merely the thermal catalyst for an underlying hardware defect.
[Cross-Section of AMOLED Display Chin]
 ┌────────────────────────────────────────────────────────┐
 │            Active OLED Glass Substrate                 │
 └──────────────────────────┬─────────────────────────────┘
                            │ (Anisotropic Conductive Film - ACF)
                   [Microscopic Trace Shear] <── Broken bond line shorts column to V_DD
                            │
               ┌────────────┴────────────┐
               │    Chip-on-Film (COF)   │ <── Driver IC located near heat path
               └────────────┬────────────┘
                            ▼
               [Motherboard Flex Cable]
Intensive Update Thermals: During a major system upgrade, the processor operates at sustained peak frequencies while flashing partition tables, driving device temperatures up to $45^circtext{C}–50^circtext{C}$.
Thermal Expansion Shearing: The copper signal traces, the glass substrate, and the flexible polyimide film expand at different coefficients of thermal expansion (CTE). In panels with narrow bezels, the heat softens the adhesive resin of the Anisotropic Conductive Film (ACF) holding the driver IC leads against the glass electrodes.
The Column Short: When a microscopic conductive trace pulls away or bridges adjacent pins, the data line controlling a single vertical subpixel column loses its variable voltage modulation and latches onto the continuous power rail, illuminating every green diode in that column at maximum intensity.
3. Software Triage: Ruling Out Firmware and Render Glitches
If the green line appeared in your screenshot test, or if you want to eliminate the remote chance of an OS-level graphics compositor freeze:
Step A: Boot into Safe Mode
Press and hold the Power button (or Power + Volume Down) until the power menu appears.
Long-press the on-screen Power Off icon until the Safe Mode prompt displays.
Tap Safe Mode to boot without third-party apps or custom overlay shaders running.
If the line vanishes, a third-party screen filter, dynamic wallpaper, or accessibility tool was injecting a rendering overlay.
Step B: Force Hardware Overlays in Developer Options
Open Settings > About Phone, and tap Build Number seven times to unlock Developer Options.
Go to Settings > System > Developer Options.
Scroll down to the Hardware accelerated rendering category.
Toggle Disable HW overlays (or Always use GPU for screen compositing) to On.
This forces the Android SurfaceFlinger to composite layers using GPU memory rather than display overlay planes, bypassing corrupted 2D hardware composer layers.
[Settings]
 └── System > Developer Options
      └── Hardware accelerated rendering
           └── [Toggle ON] "Disable HW overlays"
4. OEM Free Replacement Programs (Samsung, OnePlus, Xiaomi)
Because this issue stems from manufacturing tolerances and thermal stress rather than user neglect, several major manufacturers offer specialized out-of-warranty screen replacement policies:
[OEM Service Center Eligibility Criteria]
 ├── Phone must pass a physical condition audit:
 │    ├── No spider-cracks or deep fractures on front display glass
 │    ├── No severe corner dents/impact marks on the aluminum frame
 │    └── Liquid Contact Indicators (LCI) must NOT be triggered (no water ingress)
 └── Claim filed within the regional service policy window
OnePlus Lifetime Screen Warranty: In several regions (most notably India and select Asian markets), OnePlus introduced an official Lifetime Warranty covering screen green lines on the OnePlus 8, 8 Pro, 8T, 9, 9R, 9 Pro, 10 Pro, and 11 series. Eligible devices receive a free screen replacement or an upgrade voucher toward a newer generation if parts are out of stock.
Samsung One-Time FOC (Free of Charge) Program: Samsung has regularly authorized service centers in multiple global markets to perform a one-time free display and battery replacement for affected Galaxy S20, S21, S21 FE, and S22 series units showing green lines after updates, provided the handset has zero external drop damage or liquid ingress.
Xiaomi / Poco: Specific models (such as the Poco X3 Pro or Xiaomi 11 series) carry extended motherboard and display replacement policies through authorized Mi Home service centers.
How to Claim:
Backup all personal data to a cloud service or PC.
Visit an Authorized OEM Service Center directly rather than using third-party retail kiosks.
Inform the service representative that the green line appeared during normal operation or following an OTA update without physical impact.
Request an inspection under the brand’s internal service bulletin for screen line anomalies.
5. Advanced Repair: Laser Screen Bonding (No Panel Swap)
If your device is out of warranty and does not qualify for an OEM program, you do not necessarily need to purchase an expensive brand-new display assembly. Specialized repair labs utilize advanced OLED Laser Bonding Machines to repair the damaged traces.
[Pulsed Laser Repair Technology]
 1. High-precision microscope identifies the severed/shorted ITO line on the glass.
 2. A calibrated laser fires focused pulses through the glass substrate.
 3. The laser vaporizes shorted bridges or welds broken copper/indium traces.
 4. Result: The green line disappears completely without removing the original OLED.
The Laser Ablation Process: The technician places the phone under an industrial repair microscope fitted with a pulsed laser. The operator locates the microscopic short on the glass margin and fires a micro-laser beam through the transparent layers to sever the short circuit or re-fuse the broken trace.
Cost Advantage: Laser repair typically costs 40% to 60% less than a full display module replacement because it preserves the original factory OLED matrix, digitizer, and front glass.
Limitations: Laser bonding is only effective if the panel’s internal glass substrate is free of physical cracks and the short is located within the laser’s focal access area.
6. Full Display Assembly Replacement: OEM vs. Aftermarket
If laser repair is unavailable and warranty assistance is denied, physical display replacement is the only remaining fix.
[Screen Replacement Quality Hierarchy]
 1. OEM / Service Pack (Original AMOLED, Full Refresh Rate, Proper Colors) ──► RECOMMENDED
 2. High-Grade Aftermarket Hard OLED (Good Colors, Thicker Bezels)        ──► ACCEPTABLE
 3. Cheap In-Cell / TFT LCD (Washed-out, High Battery Drain, No Fingerprint) ──► AVOID
Always Choose OEM “Service Pack” Screens: Authentic service packs include the pre-bonded magnesium frame, genuine AMOLED matrix, and new ear-speaker mesh.
Avoid Budget In-Cell / LCD Panels: Low-cost repair shops often attempt to replace AMOLED displays with cheaper In-Cell LCDs. These aftermarket LCDs lack deep blacks, draw substantially more battery power, disable under-display optical fingerprint sensors, and feature thick bottom bezels that restrict touch responsiveness.
Recalibrate Biometrics: On modern devices (such as Samsung Galaxy or Google Pixel), a screen replacement requires running a Fingerprint Sensor Calibration tool (via web-based calibration utilities or manufacturer service software) to re-align the optical/ultrasonic sensor with the new glass layer.
If your phone screen develops a green line, back up your photos, contacts, and two-factor authentication tokens immediately. Because the Anisotropic Conductive Film (ACF) delamination often continues to spread along adjacent pins under ongoing thermal cycles, a single isolated green line will frequently progress into multiple white, pink, or purple lines, or eventually cause the entire OLED display matrix to black out completely.