
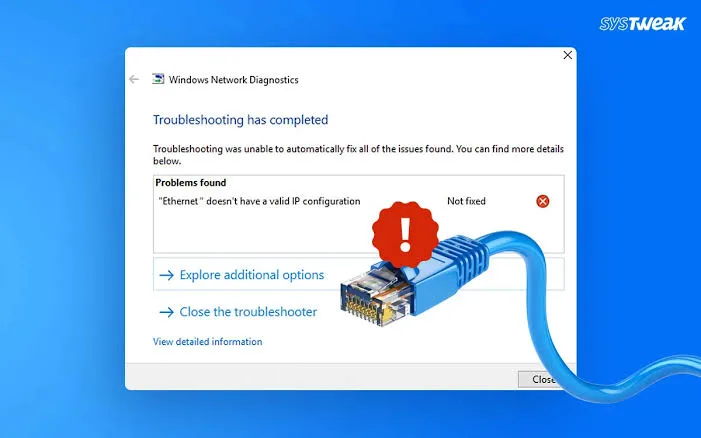
How to Fix “Ethernet Doesn’t Have a Valid IP Configuration” in Windows 10
The “Ethernet doesn’t have a valid IP configuration” error occurs when the Windows network client fails to complete the four-step DHCP negotiation handshake (DORA: Discover, Offer, Request, Acknowledge) with your local gateway or router. When the host sends out a broadcast DHCPDISCOVER packet over UDP port 67/68 and receives no valid DHCPACK, or when the transaction times out, the Windows TCP/IP stack falls back to Automatic Private IP Addressing (APIPA) under RFC 3927. This assigns an unroutable address in the 169.254.0.1 to 169.254.255.254 block with a 255.255.0.0 subnet mask and no default gateway.
This breakdown typically stems from corrupted socket catalogs in the Winsock API, stale lease state stored during Windows Fast Startup hibernation, router DHCP address pool exhaustion, third-party NDIS filter driver conflicts, or incorrect manual IPv4 static assignments.
Quick Diagnostic Matrix
| Symptom | Root Cause | Inspection / Diagnostic Path | Recommended Fix |
IP begins with 169.254.x.x; Default Gateway is blank | DHCP DORA handshake timed out; Windows engaged APIPA fallback | ipconfig /all in Command Prompt | Release and renew the DHCP lease; power-cycle router to clear DHCP table. |
| Error appears after waking PC from Sleep or Fast Startup | Windows kernel hibernation (hiberfil.sys) preserves an expired IP lease | powercfg.cpl (Power Options) | Disable Fast Startup; execute a cold reboot to force a fresh network bind. |
| Adapter status shows “Identifying…” indefinitely | Winsock catalog corruption or broken TCP/IP stack bindings | Command Prompt (Admin) | Execute netsh winsock reset and netsh int ip reset; flush DNS. |
| Manual IP set, but subnet or gateway does not match router | Static IP assigned on wrong subnet (e.g., 192.168.0.x vs 192.168.1.x) | ncpa.cpl > IPv4 Properties | Reconfigure adapter to Obtain an IP address automatically (DHCP). |
| Ethernet shows no valid IP; other devices on Wi-Fi work fine | Virtual network adapter hooks or VPN/Antivirus NDIS driver crash | ncpa.cpl > Adapter Properties | Uncheck third-party NDIS lightweight filters; reinstall NIC driver. |
1. Release & Renew DHCP Lease via Command Prompt
When the network stack stalls in an APIPA loop, issuing standard DHCP refresh commands forces the network interface card (NIC) to discard the 169.254.x.x address and broadcast a new discovery frame to the gateway.
[DHCP Negotiation Flow]
 Client (PC)                                Router (DHCP Server)
     │                                                │
     ├─── DHCPDISCOVER (Broadcast to 255.255.255.255) ─►│
     │◄── DHCPOFFER (Unicast IP Offering) ────────────┤
     ├─── DHCPREQUEST (Requesting Leased IP) ────────►│
     │◄── DHCPACK (Acknowledgment & Lease Finalized) ──┤
     │                                                │
     └── [If Handshake Fails: Client Drops to APIPA 169.254.x.x]
Press
Windows Key + S, typecmd, right-click Command Prompt, and select Run as administrator.Run the following command to release the existing (or stuck APIPA) IP address:
DOSipconfig /releaseFlush the local DNS resolver cache to clear corrupted hostname mappings:
DOSipconfig /flushdnsQuery the local router for a fresh lease:
DOSipconfig /renewCheck the output of
ipconfig /renew:Success: Windows reports an IPv4 address matching your local subnet (e.g.,
192.168.1.Xor10.0.0.X) with a valid Default Gateway.Failure: If the terminal displays “An error occurred while renewing interface Ethernet: unable to contact your DHCP server”, proceed to Step 2.
2. Reset the TCP/IP Stack, Winsock Catalog, and ARP Table
Network filter drivers, virtual adapters (from Hyper-V, VMware, or Docker), and VPN software inject Layered Service Providers (LSPs) into the Windows Sockets (Winsock) API. If an LSP becomes desynchronized or terminates unexpectedly, it blocks incoming DHCP offer packets from reaching the OS socket layer.
[Command Prompt (Administrator Execution Path)]
 ├── netsh winsock reset
 ├── netsh int ip reset c:resetlog.txt
 ├── netsh int ipv6 reset
 └── arp -d *
Open Command Prompt as Administrator.
Reset the Winsock catalog back to clean system defaults:
DOSnetsh winsock resetRe-write the TCP/IP registry keys and generate an execution log:
DOSnetsh int ip reset c:resetlog.txtReset the IPv6 network stack:
DOSnetsh int ipv6 resetFlush the Address Resolution Protocol (ARP) table to clear poisoned or stale MAC-to-IP bindings:
DOSarp -d *Restart your computer. Do not skip this restart; the registry rewrites executed by
netsh int ip resetdo not load until the kernel re-initializes.
3. Verify IPv4 and DNS Adapter Settings (Force Auto-DHCP)
If a static IP address was configured previously—or if a third-party application forced a manual IP on an incorrect subnet—Windows cannot route packets through your router’s default gateway.
[Network Connections (ncpa.cpl)]
 └── Ethernet > Properties > "Internet Protocol Version 4 (TCP/IPv4)" > Properties
      ├── (•) Obtain an IP address automatically
      └── (•) Obtain DNS server address automatically
Press
Windows Key + R, typencpa.cpl, and press Enter to open Network Connections.Right-click your active Ethernet adapter and select Properties.
In the list under “This connection uses the following items”, click Internet Protocol Version 4 (TCP/IPv4), then click the Properties button below it.
Ensure both radio buttons are checked:
Obtain an IP address automatically
Obtain DNS server address automatically
Click OK, then click the Alternate Configuration tab at the top. Ensure it is set to Automatic private IP address (or verify that no conflicting manual parameters are entered).
Click OK to close all windows and test network discovery.
4. Disable Conflicting NDIS Lightweight Filter Drivers
Third-party antivirus suites, software firewalls, virtual machine bridges, and packet capture tools (like Wireshark or Npcap) install intermediate NDIS filter drivers directly into your physical network adapter’s binding stack. A corrupted filter driver will silently discard incoming broadcast UDP traffic.
[Ethernet Properties Component Tree]
 ┌────────────────────────────────────────────────────────┐
 │ [X] Client for Microsoft Networks                      │
 │ [X] File and Printer Sharing for Microsoft Networks    │
 │ [X] Internet Protocol Version 4 (TCP/IPv4)             │
 │ [ ] VirtualBox NDIS6 Bridged Networking Driver  <──────┼── UNCHECK
 │ [ ] AVG / Avast / Norton Network Filter Driver  <──────┼── UNCHECK
 │ [ ] Npcap Packet Driver (NPCAP)                 <──────┼── UNCHECK
 │ [X] Internet Protocol Version 6 (TCP/IPv6)             │
 └────────────────────────────────────────────────────────┘
Open Network Connections (
ncpa.cpl).Right-click Ethernet and select Properties.
Review the items in the list. Identify any non-Microsoft third-party filter drivers:
Npcap Packet Driver / WinPcap
VirtualBox NDIS6 Bridged Networking Driver
VMware Bridge Protocol
Antivirus filters (e.g., Kaspersky Anti-Virus NDIS 6 Filter, Avast Firewall Driver)
Uncheck the boxes next to these third-party filters (do not uncheck IPv4, IPv6, Client for Microsoft Networks, or QoS Packet Scheduler).
Click OK to re-bind the adapter without intermediate packet interception.
5. Disable Windows Fast Startup (Clear Latched Leases)
Windows 10 enables Fast Startup by default. Instead of performing a true cold shutdown, Fast Startup saves kernel sessions, device drivers, and network state into the hiberfil.sys file. If your router assigned your PC a new IP address while the PC was off, or if the router was rebooted, waking the PC causes a collision between the cached lease in memory and the router’s active DHCP table.
[Windows Control Panel (powercfg.cpl)]
 └── Choose what the power buttons do
      └── Change settings that are currently unavailable
           └── [UNCHECK] "Turn on fast startup (recommended)" ──► Save changes
Press
Windows Key + R, typepowercfg.cpl, and press Enter.In the left-hand column, click Choose what the power buttons do.
Click the blue shield link near the top: Change settings that are currently unavailable.
Scroll to the bottom under Shutdown settings.
Uncheck the box next to Turn on fast startup (recommended).
Click Save changes.
Shut down your PC completely (do not select Restart). Wait 30 seconds, then power it back on to force a complete hardware and kernel re-enumeration.
6. Cold Power-Cycle Router & Verify DHCP Address Pool Scope
If the router’s internal DHCP daemon has frozen, or if the available IP address pool has been fully allocated by smart home devices, smartphones, and guest users, the router will drop all incoming DHCPDISCOVER frames from your PC.
[Router Subnet & Pool Allocation]
 Router Gateway: 192.168.1.1 (Subnet: 255.255.255.0)
 ┌────────────────────────────────────────────────────────┐
 │ DHCP Start IP: 192.168.1.100                           │
 │ DHCP End IP:   192.168.1.254                           │
 │ Active Leases: 154 / 154  <── [POOL EXHAUSTED: DHCP DROPS INCOMING REQUESTS]
 └────────────────────────────────────────────────────────┘
Reboot the Gateway: Disconnect the power adapter from your router/modem. Wait 60 seconds to drain internal capacitors, then plug it back in. Allow 2–3 minutes for upstream WAN and internal LAN routing engines to stabilize.
Access Router Admin Console:
Open a web browser on another connected device (such as your phone on Wi-Fi).
Navigate to your gateway address (typically
192.168.1.1,192.168.0.1, or10.0.0.1).Log into the router management dashboard.
Inspect the DHCP Pool:
Navigate to LAN Setup or DHCP Server Settings.
Verify that DHCP Server is set to Enabled.
Check the DHCP IP Address Range (e.g.,
192.168.1.2through192.168.1.254). If the range is restricted to a narrow scope (e.g., only 5 addresses) and all are leased, expand the ending IP range.If an existing lease reservation is attached to your PC’s Ethernet MAC address, delete it to allow a fresh lease assignment.
7. Reinstall the Ethernet Network Interface Controller (NIC) Driver
Corrupted miniport drivers will fail to expose the adapter’s physical MAC address properly, preventing the router from verifying the client hardware identifier.
[Device Manager (devmgmt.msc)]
 └── Network adapters > [Your Ethernet Controller]
      └── Right-click > "Uninstall device"
           └── [Check] "Attempt to remove the driver for this device" > Confirm
                └── Action Menu > "Scan for hardware changes"
Press
Windows Key + Xand select Device Manager (devmgmt.msc).Expand the Network adapters category.
Right-click your physical adapter (e.g., Realtek PCIe GbE Family Controller, Intel I219-V, or Intel I225-V Ethernet Controller) and select Uninstall device.
Check the box labeled Attempt to remove the driver for this device (if available) and click Uninstall.
At the top of the Device Manager window, click the Action menu and select Scan for hardware changes.
Windows will redetect the physical PCIe/USB controller and reload the native Microsoft inbox driver.
Best Practice: Download the latest standalone WHQL driver package from your motherboard manufacturer’s support site (Intel or Realtek) on a secondary device, copy it via USB, and install the clean vendor binary.
8. Assign a Temporary Static IP (Diagnostic Isolation)
To determine whether the failure is strictly isolated to the router’s DHCP broadcast service or if the physical Ethernet link itself cannot pass IP traffic, configure a manual static IP address matching your local subnet.
[Static IPv4 Configuration Example (for a 192.168.1.1 Gateway)]
 ├── IP Address:      192.168.1.185 (Pick high, unused number)
 ├── Subnet Mask:     255.255.255.0
 ├── Default Gateway: 192.168.1.1
 ├── Preferred DNS:   1.1.1.1 (Cloudflare)
 └── Alternative DNS: 8.8.8.8 (Google)
Open Network Connections (
ncpa.cpl).Right-click Ethernet > Properties > select Internet Protocol Version 4 (TCP/IPv4) > click Properties.
Select Use the following IP address:
IP address: Enter an address matching your router’s subnet, picking an IP outside your typical DHCP pool to prevent collisions (e.g.,
192.168.1.185).Subnet mask:
255.255.255.0Default gateway: Enter your router’s exact IP (e.g.,
192.168.1.1or192.168.0.1).
Select Use the following DNS server addresses:
Preferred DNS server:
1.1.1.1Alternate DNS server:
8.8.8.8
Check Validate settings upon exit and click OK.
Interpret the Result:
If Internet Works Immediately: Your physical cable, NIC hardware, and routing paths are fully intact. The issue is confirmed to be an upstream DHCP server failure, broadcast packet filtering on your router, or a blocked UDP port 67/68 on your gateway.
If Internet Still Fails: The issue is physical layer signal loss, a defective Ethernet cable, or hardware damage on the Ethernet controller.
If your PC fails to establish an IP connection even under a known-good static IP configuration, the physical layer (PHY) is failing to maintain packet integrity. This points to a broken pair on Pins 1, 2, 3, or 6 within the RJ45 Ethernet patch cable, bent copper contact pins inside the motherboard’s RJ45 jack, or blown isolation magnetics on the network card caused by an electrostatic discharge (ESD) or line power surge. Testing with a known-working Cat 6 patch cable plugged into an alternate switch/router port will confirm whether the physical onboard controller has suffered hardware degradation.