
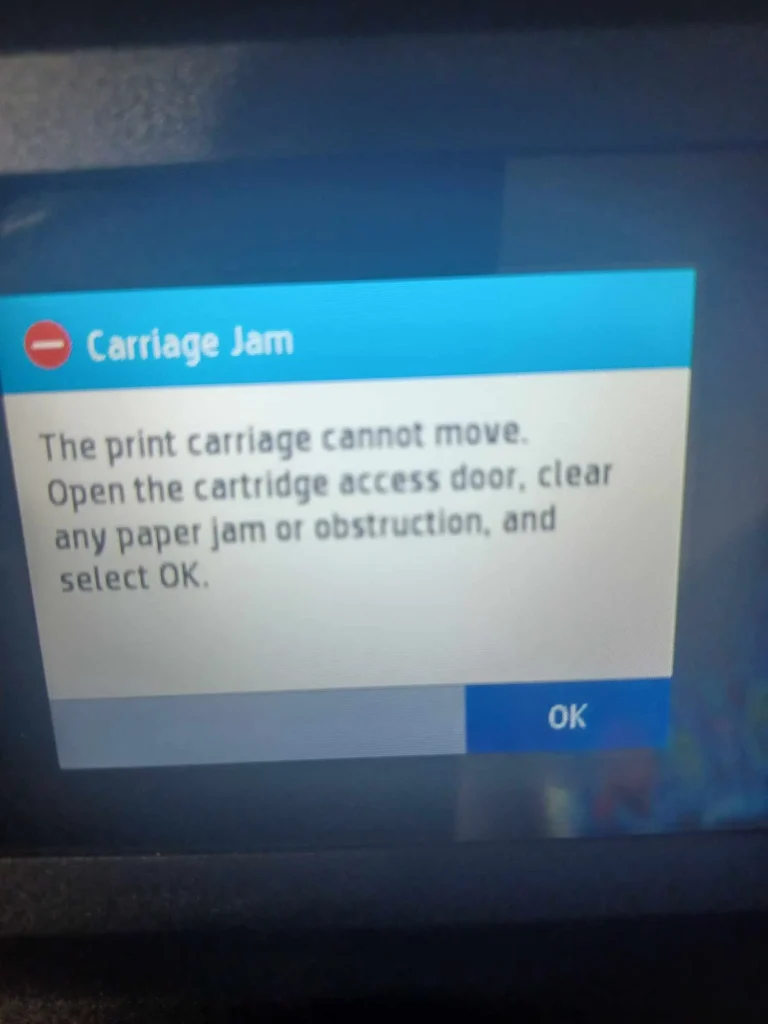
How to Fix HP Printer “Carriage Cannot Move” (Carriage Jam)
The “Carriage Cannot Move” or “Carriage Jam” error on HP printers (including OfficeJet, DeskJet, Envy, and Smart Tank series) occurs when the printer’s motor controller detects an overcurrent condition on the carriage drive DC motor or when the optical sensor fails to register positional pulses along the timing encoder strip. When the carriage encounters physical resistance—such as trapped paper scraps, an unlatched ink cartridge catching on the upper chassis, or a seized service station capping sled—or when grease and aerosolized ink obscure the optical reader, the mainboard cuts power to the motor driver within milliseconds to prevent stripped drive belts, blown motor driver ICs, or burned motor windings.
Quick Diagnostic Matrix
| Symptom | Root Cause | Inspection / Tool | Recommended Fix |
| Carriage stuck on the far right; loud grinding noise on boot | Service station capping sled or wiper mechanism locked in the upright position | Right Maintenance Bay | Manually rotate the service station gears forward to drop the capping sled. |
| Carriage moves an inch, stops abruptly with “Carriage Jam” | Ink cartridge latch slightly raised and colliding with the upper frame | Cartridge Bay / Latches | Re-seat all cartridges; press down firmly until each retention latch snaps flush. |
| Carriage slams violently into left or right chassis wall | Optical timing encoder strip dirty, unhooked, or dislodged from sensor slot | Optical Encoder Strip | Clean strip with a dry microfiber cloth; verify strip sits inside the carriage optical slot. |
| Carriage feels completely locked and cannot be moved by hand | Mechanical carriage lock engaged while printer is powered off normally | Carriage Release / Power | Unplug AC power during mid-sweep or press the manual mechanical carriage release tab. |
| Carriage moves smoothly by hand, but motor fails to move it | Slipped or broken toothed drive belt; stripped brass drive pinion | Belt & Motor Pinion | Inspect toothed rubber belt tension; re-hook onto the carriage bracket and motor pulley. |
1. Disengage the Carriage Lock and Drain Flea Power
HP printers feature an electromechanical brake that locks the carriage into the right-hand service bay when powered down normally. If the machine shuts down abruptly during an error, this lock can remain engaged. Performing a cold power drain clears temporary logic board errors and releases the brake.
[Printer Powered ON / Showing Carriage Error]
 └── Open Cartridge Access Door ──► Wait for Carriage to move toward center
      └── PULL AC Power Cord directly from wall outlet (Leaves Carriage Unlocked)
           └── Disconnect USB Cable / Ethernet
                └── Press and Hold [Power] Button for 60 Seconds
Turn on the printer and open the ink cartridge access door.
Observe the carriage:
If the carriage moves toward the center: Pull the AC power cord directly from the wall outlet immediately while it is in motion. This leaves the carriage free in the center track.
If the carriage does not move: Pull the power cord anyway. Reach into the right-side cavity and feel for a small plastic locking arm behind or beside the carriage. Gently press it backward or downward to release the carriage lock, then slide the assembly toward the center by hand.
Hold the physical Power button on the printer for 60 seconds to bleed residual voltage from the logic board capacitors.
Leave the printer unpowered for 5 minutes.
2. Inspect Cartridge Seating and Access Door Latches
On many HP printers (particularly the OfficeJet Pro 8000/9000 and DeskJet series), vertical clearance inside the carriage path is less than $2text{ mm}$. If an ink cartridge is not fully engaged, its top lip will strike the plastic ceiling of the chassis during lateral traversal, causing an immediate stall.
[Carriage Profile / Cartridge Clearance]
   ┌──────────────────────────────────────────────┐
   │ [Chassis Upper Frame / Ceiling Guide]        │
   │ ░░░░░░░░░░░░░░░░░░░░░░░░░░░░░░░░░░░░░░░░░░░░ │
   │   ┌──────┐  ┌──────┐  ┌──────┐  ┌──────┐     │
   │   │  K   │  │  C   │  │  M   │  │ [Y]  │ <── Raised Cartridge Strikes Frame!
   │   └──────┘  └──────┘  └──────┘  └──▲───┘     │
   │ [================ Carriage Base =============] │
   └──────────────────────────────────────────────┘
With the carriage in the center access area, inspect each cartridge:
Individual Cartridge Models (OfficeJet/PageWide): Push each cartridge in until it clicks. If a cartridge springs back out slightly, remove it, inspect the rear latch spring, and reinsert it firmly.
Two-Cartridge Models (DeskJet/Envy): Pull open the purple or gray cartridge latch cover, ensure the cartridge is seated straight in its cradle, and snap the cover down until it locks completely flat.
Check the cartridge access door sensor switch:
Inspect the plastic tab on the access lid that trips the internal interlock switch when closed. If this tab is bent or broken, the printer assumes the door is open and halts the carriage.
3. Clear Hidden Debris from the Platen and Paper Path
A tiny fragment of ripped paper or a dislodged staple wedged beneath the carriage can generate enough frictional drag to trigger the motor driver’s overcurrent protection circuit.
[Chassis Interior With Carriage Centered]
 ┌────────────────────────────────────────────────────────┐
 │ [Left Bay]               [Center Platen]               [Right Bay] │
 │ ░░░░░░░░░░         ┌─────────────────────────┐         ░░░░░░░░░░░ │
 │                    │   Carriage Assembly     │                     │
 │                    └─────────────────────────┘                     │
 │ [==== Platen Rollers ====] [==== Paper Feed Path ====]             │
 └────────────────────────────────────────────────────────┘
Slide the carriage all the way to the far left.
Shine a bright flashlight into the right-hand cavity and inspect the platen (the black plastic surface with small ribbed rollers):
Look for shredded paper fragments, torn labels, or paperclips.
Slide the carriage all the way to the far right and inspect the left side of the track.
Check the Rear Access Door or Duplexer Module:
Turn the printer around, locate the rear clean-out door or two-sided printing accessory, and unlatch it.
Remove any paper trapped between the feed rollers.
Rotate the black rubber feed rollers by hand to ensure they spin freely without mechanical binding.
Reattach the rear door firmly; an unseated rear door prevents the paper feed roller clutch from disengaging, which can hold the carriage locked.
4. Clean and Seat the Optical Timing Encoder Strip
The encoder strip is a thin, flexible plastic ribbon suspended across the entire length of the carriage path, etched with microscopic vertical timing lines. If ink mist, aerosolized grease, or finger oils smudge this strip, the transmissive optical sensor mounted on the back of the carriage miscounts motor pulses. This causes the carriage to lose track of its position and slam into the sides or halt with a jam error.
[Encoder Strip & Optical Sensor Routing]
 ┌──────────────────────────────────────────────┐
 │   [======= Clear Plastic Encoder Strip =======]  <── Clean with dry microfiber
 │   [============= Steel Guide Rail ============]  <── Lubricate with synthetic oil
 └──────────────────────┬───────────────────────┘
                        ▼
            ┌───────────────────────┐
            │ Carriage Optical Slot │ <── Strip must sit dead-center in sensor channel
            └───────────────────────┘
Locate the clear plastic strip running horizontally directly behind and slightly above the steel guide rod.
Inspect Physical Placement:
Verify the strip is under spring tension and anchored onto the metal bracket tabs at both the far-left and far-right chassis walls.
Verify the strip passes cleanly through the slot of the optical sensor located on the rear of the carriage board. If it has popped out of the slot, carefully unhook the left spring, thread the strip back between the sensor’s optical eyes, and re-hook it.
Clean the Strip:
Take a dry, lint-free microfiber cloth or optical lens wipe.
Critical Caution: Do not use isopropyl alcohol, glass cleaners, or solvents. Chemical solvents will permanently strip the printed grid lines from the mylar film, ruining the part.
Pinch the strip lightly between your thumb and index finger using the dry microfiber cloth.
Gently wipe along the length of the strip from one side to the other. Support the strip with your opposite hand to avoid unseating the tension spring.
5. Free and Lower the Service / Purge Station Sled
The service station (located in the right bay) contains the capping station, rubber wiper blades, and waste ink spittoon. When the printer is idle, this station lifts upward to seal the printhead nozzles. If waste ink coagulates on the cam rails, the sled sticks in the raised position, physically blocking the carriage from docking or leaving the bay.
[Right Maintenance Station]
 └── Slide Carriage manually to the far-left bay
      └── Inspect Right Cavity for Hardened Waste Ink Sludge
           └── Rotate White Plastic Spur Gears Forward
                └── Capping Sled Lowers Flush into Chassis Floor
Move the carriage manually to the far-left side.
Look down into the right service station cavity using a flashlight.
Inspect the rubber capping cups:
If the caps or wipers are covered in sticky, tar-like ink deposits, dampen a cotton swab with warm distilled water and clean the sliding tracks around the perimeter of the sled.
Locate the white plastic drive gears along the side or rear of the service station mechanism.
Using a gloved finger or non-conductive probe, rotate the gears forward (toward the front of the printer):
This mechanical rotation cycles the cam gear, forcing the capping sled to drop down flat into its recessed home position.
Push the carriage back into the right bay by hand. It should now glide smoothly over the lowered capping sled without hitting any raised plastic lip.
6. Inspect the Carriage Belt and Lubricate the Guide Rod
Over time, factory grease on the steel carriage rail dries out and collects airborne paper dust, forming a thick paste that increases friction on the carriage bushings.
[Carriage Drive Belt & Rail]
 ┌──────────────┐                               ┌──────────────┐
 │ Motor Pulley │═════════[Toothed Belt]════════│ Idle Pulley  │
 └──────────────┘         ┌────────────┐        └──────────────┘
                          │  Carriage  │
 [========================┴────────────┴=======================] Main Steel Rail
Inspect the Drive Belt:
Check the black toothed rubber belt running behind the carriage.
Ensure it is looped tightly around the brass drive pulley on the carriage motor (usually on the left) and the tensioner pulley (on the right).
Verify the teeth on the belt are not stripped or worn smooth.
Clean and Lubricate the Steel Rod:
Slide the carriage to one side.
Moisten a clean cloth with 99% isopropyl alcohol (IPA) and wipe old, blackened grease and dust off the exposed steel rail.
Slide the carriage to the opposite side and clean the remaining portion of the rod.
Apply 2 to 3 drops of synthetic light machine oil (e.g., Tri-Flow or sewing machine oil) or PTFE synthetic lubricant along the top surface of the rail.
Caution: Never use WD-40, silicone spray, or automotive grease. These degrade the carriage’s internal POM plastic bushings and attract paper dust.
Slide the carriage back and forth manually several times to distribute the oil evenly across the internal bushings.
7. Perform an HP Semi-Full System Reset
If the mechanical path is clear and the carriage moves freely by hand, the printer’s non-volatile memory (NVRAM) may have latched a persistent stall fault that standard restarts will not clear. A Semi-Full Reset recalibrates the carriage motor voltage baseline and resets factory home coordinates.
For Touchscreen Models (OfficeJet / PageWide / Smart Tank):
Power on the printer.
Tap the Back arrow (↩) button on the front bezel 4 times in rapid succession (even if the button is not illuminated).
The screen will display the blue Support Menu.
Press OK or navigate to Resets Menu.
Scroll down to Semi-Full Reset and select OK.
The printer will power off automatically. Wait 30 seconds, then press the Power button.
The printer will execute a complete initial power-on calibration routine, cycling the carriage across both stops to relearn its boundary limits.
For Button-Only Models (DeskJet / Ink Advantage):
With the printer turned on, disconnect the power cord from the back of the unit.
Unplug the power cord from the wall outlet.
Wait 60 seconds.
Press and hold both the Power button and the Cancel (X) button simultaneously.
While holding both buttons, plug the power cord back into the printer.
Continue holding the buttons for 10 seconds until the resume/power light flashes, then release.
If the carriage motor hums or chatters loudly upon boot without moving—while the carriage remains completely free to slide by hand when powered off—the fault is an electromechanical failure. This points to stripped teeth on the carriage motor’s brass drive gear, an open-circuit failure in the motor’s internal armature windings, or a damaged motor driver MOSFET on the printer’s main logic board, requiring a replacement carriage drive motor or mainboard.