
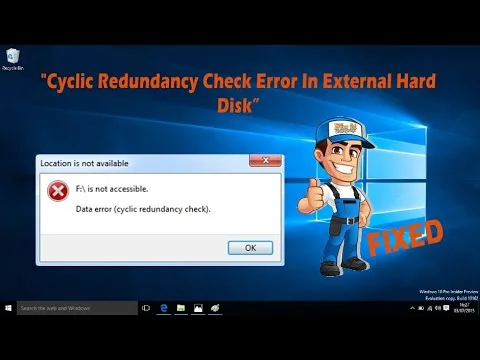
How to Fix How Do I Fix The Cyclic Redundancy Check Error On My External Hard Drive
A Cyclic Redundancy Check (CRC) error occurs when the hard drive controller or operating system detects a checksum mismatch between the polynomial hash generated during data write operations and the hash calculated upon reading the data from the storage sectors. When Windows attempts to access a sector and the calculated cyclic redundancy value does not match the stored checksum block, the operating system raises Win32 error code 23 (ERROR_CRC: “Data error (cyclic redundancy check)”).
On external drives, this failure originates from one of two levels: Transmission-level corruption (damaged USB cables, insufficient 5V/12V bus power, or failing SATA-to-USB bridge controller boards corrupting data packets in transit) or Media-level corruption (magnetic platter degradation, failing read/write heads, or bad sectors that fail Error Correction Code [ECC] decoding).
Quick Diagnostic Matrix
| Symptom | Root Cause | Inspection / Tool | Recommended Fix |
| Drive accessible, but specific files fail to copy with CRC error | Logical or physical bad sectors holding corrupted data blocks | Command Prompt (chkdsk) | Run chkdsk X: /f /r /x to isolate bad blocks and rewrite file pointers. |
| Drive shows as “RAW” or prompts to format when plugged in | Corrupted Master Boot Record (MBR), GUID Partition Table (GPT), or Master File Table (MFT) | diskmgmt.msc / TestDisk | Scan partition headers using TestDisk; repair boot sector and partition geometry. |
| S.M.A.R.T. shows increasing “UltraDMA CRC Error Count” (ID 199/C7) | Communication failure across the USB cable or SATA-to-USB bridge board | CrystalDiskInfo | Swap USB cable; bypass unpowered hubs; plug directly into rear motherboard I/O. |
| S.M.A.R.T. shows high “Pending” or “Reallocated” sectors (ID 05/C5) | Physical platter degradation or head assembly degradation | S.M.A.R.T. Telemetry | Stop file access immediately. Create a block-level clone using ddrescue before data recovery. |
| Drive clicks, chirps, or spins down repeatedly with CRC errors | Head assembly crash (preamp short) or mechanical failure | Physical Audio Check | Power off immediately; do not run CHKDSK. Requires clean-room professional recovery. |
1. Inspect Physical USB Link and S.M.A.R.T. Telemetry
Before executing disk scans that stress the drive’s mechanics, determine whether the CRC error is occurring over the transmission interface (cable/port/bridge) or on the internal magnetic media.
[External Drive Interface Architecture]
 [Host PC (Motherboard)] ════ (USB Cable) ════► [SATA-to-USB Bridge IC] ════ (SATA Rail) ════► [Drive Platter / HDA]
           ▲                                             ▲                                             ▲
           └── Check: Rear I/O Port                      └── S.M.A.R.T. ID 199 (C7)                    └── S.M.A.R.T. ID 05 & C5
               (Eliminate Voltage Sag)                       (UltraDMA CRC Errors)                         (Bad Sectors / Platters)
- Eliminate Interface Degradation:
- Disconnect the drive from unpowered front-panel PC ports, keyboard pass-throughs, or USB hubs. Plug directly into a rear motherboard USB 3.0/3.2 port on desktop systems (or directly into the laptop chassis).
- Replace the USB data cable (particularly the fragile USB 3.0 Micro-B connector standard on portable drives, which prone to micro-fractured data pins).
- For 3.5-inch desktop external drives requiring a standalone 12V DC wall adapter, verify the power supply is delivering stable voltage under load; an aging 12V power supply will drop voltage when the spindle motor spins up, causing CRC packet drops.
- Read S.M.A.R.T. Health via CrystalDiskInfo:
- Download and run CrystalDiskInfo (or use
Get-PhysicalDisk/smartctlin terminal). - Locate your external drive and review the following raw hexadecimal values:
- ID 05 (Reallocated Sectors Count): Sectors already marked dead and swapped with spare sectors. Any non-zero raw value indicates physical media degradation.
- ID C5 (Current Pending Sector Count): Unstable sectors waiting to be remapped due to read errors. This is the primary driver of logical CRC errors.
- ID C7 / 199 (UltraDMA CRC Error Count): This counter increments only when data is corrupted while traveling over the interface bus between the drive controller and the host. If this value is high but ID 05 and C5 are zero, your drive platters are healthy—the CRC error is caused 100% by a bad USB cable, loose port, or defective USB enclosure bridge.
2. Isolate Drive Media via Enclosure Shucking (Desktop Drives)
If the drive is an external desktop unit (or select Seagate portable drives) and reports UltraDMA CRC errors, the failure is often located on the external enclosure’s SATA-to-USB bridge board (such as an ASMedia or JMicron bridge controller) rather than the drive itself.
[External Enclosure Teardown]
 ┌────────────────────────────────────────────────────────┐
 │ Plastic Shell Enclosure                                │
 │   ┌──────────────────────────┐  ┌──────────────────┐   │
 │   │ Standard 3.5"/2.5" Drive │══│ SATA-to-USB PCB  │───┼──► (Prone to bridge failure)
 │   └──────────────────────────┘  └────────┬─────────┘   │
 └──────────────────────────────────────────┼─────────────┘
                                            ▼
                    [Bypass by connecting internal SATA direct to PC]
- Pry open the external casing using a plastic spudger.
- Inspect the drive interface:
- Seagate Backup Plus / Expansion: Features a standard internal SATA interface attached to a detachable clip-on USB bridge adapter. Unplug the adapter and connect the bare drive directly to a desktop motherboard via an internal SATA cable and power plug.
- Western Digital Elements / My Passport: Most modern 2.5-inch WD portable drives have the USB connector and bridge chip soldered directly onto the drive’s main PCB, preventing direct SATA shucking. In this case, proceed to Section 3.
3. Repair File Allocation & Sector Pointers with CHKDSK
If S.M.A.R.T. shows healthy hardware (or minimal pending sectors) and the drive has an assigned drive letter, run the Windows Check Disk utility to scan sector integrity and rebuild the Master File Table (MFT).
Warning: Do not run CHKDSK if the drive is producing rhythmic clicking, scraping, or beeping noises. CHKDSK performs aggressive read/write stress operations across damaged tracks that can permanently destroy a failing magnetic head assembly.
[Command Prompt (Run as Administrator)]
 └── chkdsk X: /f /r /x
      ├── /f ──► Fixes logical errors and rebuilds MFT directory indexes
      ├── /r ──► Locates bad sectors and recovers readable physical information
      └── /x ──► Forces the volume to dismount before scanning begins
- Press
Windows Key + S, typecmd, right-click Command Prompt, and select Run as administrator. - Identify the assigned drive letter of your external drive in Windows Explorer (e.g.,
E:,F:). - Execute the deep surface scan command:DOS
chkdsk E: /f /r /x(ReplaceE:with your external drive’s actual drive letter). - Execution Stages:
- Stage 1 & 2: Examines basic file system structure and file name linkages.
- Stage 4 & 5: Reads every physical sector cluster on the volume. If an unreadable sector is detected, the controller marks that sector as bad, reads available data via hardware parity, moves the data to an operational spare sector, and updates the cluster bitmap.
- If the scan hangs for hours at a single percentage point (e.g., “Stage 4: Examining bad clusters”), the drive contains severe physical platter damage. Cancel the scan (
Ctrl + C) and proceed immediately to image-level cloning.
4. Recover Partition Tables via TestDisk (RAW Drives)
If the CRC error prevents Windows from reading the volume boot record—causing the disk to appear as RAW, unallocated, or unformatted in Disk Management—use TestDisk to parse the underlying partition structures.
[TestDisk Command Flow]
 Create Log ──► Select Physical Drive (/dev/sdb or Disk 1) ──► Partition Table Type (Intel/EFI GPT)
      └── Analyze ──► Quick Search ──► Backup Boot Sector Check ──► Write Partition Table
- Download and extract TestDisk (open-source partition recovery utility).
- Right-click
testdisk_win.exeand select Run as administrator. - Select Create to initialize a new diagnostic log.
- Use the arrow keys to highlight your external drive (identify by drive capacity, e.g.,
Drive /dev/sdb - 2000 GB / 1863 GiB), and press Enter. - Select the partition table type: choose EFI GPT for modern drives (>2 TB) or Intel for older MBR partitions, then press Enter.
- Select Analyse, then press Quick Search.
- TestDisk will probe the cylinders to locate hidden or corrupted file system headers:
- If partitions appear highlighted in green, press P to view the underlying files. If your files display correctly, press Q to exit the file viewer, press Enter, and select Write to commit the corrected partition table back to sector 0.
- If the search reports “Boot sector bad”, navigate to Advanced > Boot and select Backup BS to overwrite the corrupted primary boot sector with the intact factory backup boot sector.
- Restart your PC to allow Windows to re-enumerate the partition.
5. Sector-by-Sector Disk Cloning via GNU ddrescue (Data Rescue)
When a drive suffers from failing sectors, attempting standard file copies via Windows Explorer results in repeated system lockups and CRC errors. The safest recovery methodology is creating an exact, sector-by-sector image file using GNU ddrescue or HDDSuperClone, which bypasses OS timeouts and avoids reading damaged areas until all healthy data is secured.
[ddrescue Two-Pass Architecture]
 Source Drive (Failing External) ──► Target Drive / Image File (Clean Drive)
   ├── Phase 1: High-Speed Sequential Copy (Skips bad blocks instantly)
   └── Phase 2: Reverse Scrape (Retries edge sectors around bad blocks with micro-timeouts)
- Create a bootable Linux USB flash drive using Ubuntu or specialized recovery environments like SystemRescue.
- Boot your computer from the USB drive.
- Open a terminal terminal window and install
ddrescue:Bashsudo apt-get update && sudo apt-get install gddrescue - List connected storage devices to identify the exact device node paths:Bash
lsblk(Identify your failing external drive, e.g.,/dev/sdb, and your healthy target destination drive, e.g.,/dev/sdc). - Execute the first pass (rapid extraction that skips bad sectors without stressing the drive heads):Bash
sudo ddrescue -d -n /dev/sdb /dev/sdc /path/to/recovery.log - Once Phase 1 finishes, run the second pass (retries damaged sectors with calibrated timeouts):Bash
sudo ddrescue -d -r 3 /dev/sdb /dev/sdc /path/to/recovery.log - Once the clone is created on the healthy destination drive, run data recovery software (such as R-Studio, DMDE, or EaseUS) directly against the cloned drive or mount it natively.
6. Complete Disk Wipe & Re-initialization via Diskpart
If diagnostic scans confirm that the CRC error was purely logical (e.g., caused by an accidental pull of the USB cable during a write operation, and S.M.A.R.T. records 0 reallocated/pending sectors), wiping the drive’s partition structures and re-initializing the file system will return the drive to working order.
Caution: The following steps permanently destroy all existing partition structures and files on the selected drive. Verify the disk number carefully before confirming.
[Diskpart Execution Sequence]
 diskpart
  ├── list disk
  ├── select disk X   <── (VERIFY EXACT NUMBER)
  ├── clean
  ├── convert gpt
  ├── create partition primary
  └── format fs=ntfs quick
- Press
Windows Key + R, typediskpart, and press Enter. - View all physical storage drives attached to the system:DOS
list disk - Locate your external hard drive number based on its capacity. Select it:DOS
select disk X(ReplaceXwith the target disk number. Selecting the wrong number will erase an internal drive). - Strip all corrupted partition structures, signatures, and MFT data:DOS
cleanIfcleanfails with a CRC error, the drive’s first physical sectors (LBA 0 / LBA 1) are permanently unreadable hardware failures. - Initialize the drive with a modern GUID Partition Table:DOS
convert gpt - Create a fresh storage volume and apply the NTFS file system:DOS
create partition primary format fs=ntfs quick assign - Exit Diskpart by typing
exit. The drive will now mount as a fresh, empty volume in Windows Explorer.
If the drive fails to initialize in Diskpart with an immediate “Data error (cyclic redundancy check)”, if the drive drops off the system bus the moment a read command is sent, or if the unit emits repetitive mechanical clicking noises upon spin-up, the storage platters have sustained rotational physical head-stack assembly failure. Software tools cannot fix damaged read/write heads or physical magnetic substrate loss; recovering data from this state requires disconnecting power to prevent media scouring and sending the drive to a professional clean-room data recovery service equipped with hardware disk imagers (such as PC-3000).