
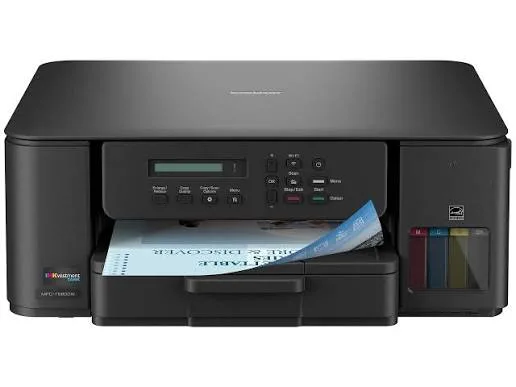
How to Fix “Paper Jam” on Brother MFC-T580DW (When There Is No Paper)
A “Paper Jam” error with an empty paper tray or a clear paper path is a common false-positive issue. It usually occurs due to a stuck mechanical sensor flag, dirty pick-up rollers, a smudged encoder strip, or residual microscopic paper scraps blocking the internal optical sensors.
Follow the step-by-step diagnostic procedures below to clear the error.
1. Inspect for Micro-Scraps and Foreign Objects
Tiny paper torn corners (as small as a grain of rice) frequently lodge inside the feed mechanism or gear tracks where standard visual checks miss them.
- Unplug the printer’s power cord from the wall outlet.
- Open the Jam Clear Cover located at the back of the machine.
- Use a flashlight to check the paper feed rollers, internal tray track, and gear assemblies.
- Lift the scanner cover and check the print head carriage path.
- If you locate any torn paper or debris (staples, paper clips), remove it gently with tweezers.
2. Inspect the Paper Sensor Lever (Actuator Flag)
Brother printers rely on physical spring-loaded plastic flags (actuators) that deflect when paper passes and snap back once cleared. If this flag gets dislodged or stuck in the back position, the logic board detects an ongoing paper presence.
- Pull the paper tray completely out of the printer.
- Shine a light onto the inner ceiling of the tray cavity.
- Locate the thin, black plastic lever hanging down in the paper feeding path.
- Gently touch it with your finger or a toothpick:
- Normal state: The flag moves freely and snaps back to its vertical resting position under spring tension.
- Stuck state: If it remains deflected upward or pushed back, manually free it. If the tiny return spring has detached, reseat it onto its anchor point.
3. Clean the Encoder Strip (Timing Strip)
The encoder strip is a thin, transparent plastic band located directly behind the print head carrier. Ink mist, dust, or fingerprints on this strip cause positioning errors that the controller often misreports as a mechanical paper jam.
- Keep the printer powered off and open the top access cover.
- Locate the clear plastic strip running horizontally behind the print carriage.
- Take a lint-free microfiber cloth lightly moistened with distilled water or pure isopropyl alcohol.
- Pinch the strip gently between two fingers using the cloth and wipe smoothly from left to right.
- Caution: Do not apply excessive force, pull the strip out of its metal tension spring, or dislodge the alignment tabs.
4. Clean the Pick-Up and Feed Rollers
Worn or glazed rubber rollers slip against the paper surface. When the motor turns but paper fails to reach the first sensor within the expected timeframe, the machine triggers a false jam.
- Remove the main paper tray.
- Clean the rubber feed rollers located above the paper cassette opening using a damp, lint-free cloth.
- Rotate the rollers manually while cleaning to remove paper dust, glaze, and ink residue along the entire surface.
- Allow them to air-dry completely before reinserting the tray.
5. Clear Static Charge and Perform a Hard Power Reset
Residual voltage inside the motherboard capacitors can preserve transient sensor fault flags even after the physical obstruction has been resolved.
- While the printer is powered on, disconnect the power cord directly from the rear socket and the wall.
- Press and hold the Power button for 30 seconds to drain residual capacitive charge.
- Wait at least 5 minutes.
- Plug the power cable directly into a grounded wall socket (bypass surge protectors or extension cords during this test).
- Turn the machine on.
6. Access Maintenance Mode to Reset Sensor Flags
If the hardware is clean but the system retains the error state in its non-volatile memory, execute a maintenance reset:
- Access the Maintenance Mode menu:
- On numeric/keypad panels, press Menu (or Settings), then quickly key in:
* 2 8 6 4. - On touch-only panels, press and hold the Home button for 5 seconds until the firmware screen opens, tap the bottom blank bar, and input
* 2 8 6 4.
- When the display shows
MAINTENANCE:- Enter code
01to initialize parameter settings and reset sensor registers. - Enter code
99to exit Maintenance Mode and reboot the device into standard operation.
Summary Checklist
| Component | What to Look For | Corrective Action |
| Clear Jam Path | Micro paper shreds in gears | Extract using tweezers |
| Sensor Actuator | Stuck/unlatched plastic flag | Realign to upright position |
| Encoder Strip | Ink smudges or grease spots | Wipe with lint-free cloth |
| Rubber Rollers | Slick or dusty roller surfaces | Clean with distilled water |
| Controller Logic | Latched firmware fault state | Hard power cycle or Maintenance 01 reset |
Note: If the error persists after completing these steps, the mechanical spring on the paper feed sensor is broken, or the infrared optical sensor (phototransistor) has experienced hardware failure and requires component-level replacement.