
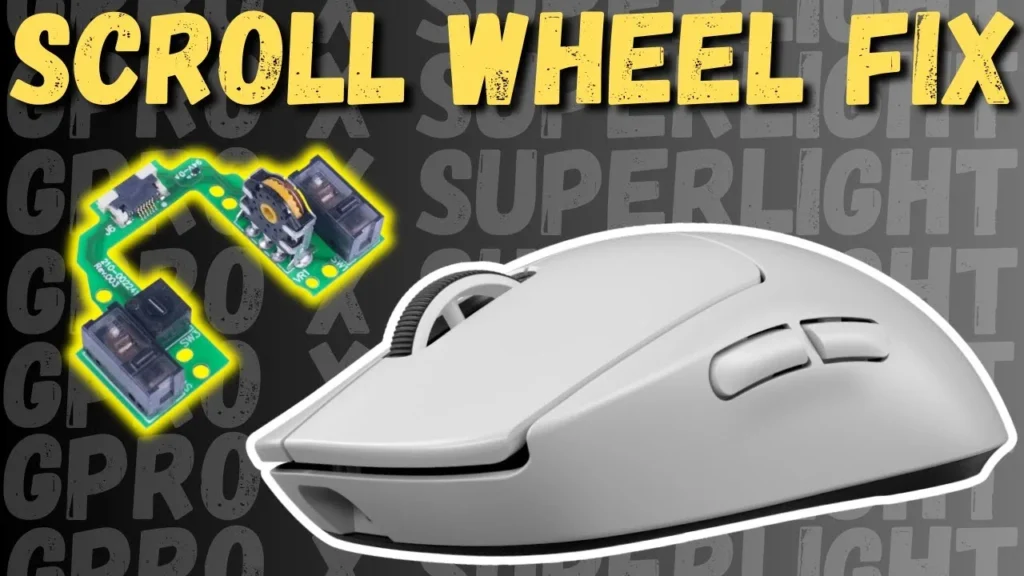
How to Fix Logitech G Pro Superlight Scroll Wheel Jumping
Logitech G Pro X Superlight (GPX) scroll wheel jumping—where scrolling in one direction intermittently stutters, stops, or jumps in the opposite direction—is caused by contact bounce and signal decoding errors inside the mouse’s mechanical rotary encoder (specifically an 8mm TTC mechanical encoder).
The encoder translates rotation into directional movement using a three-pronged wiper contact tracking across two patterned conductive copper/carbon traces, producing 2-bit quadrature Gray code signals (Channel A and Channel B). When dust, hair, dried factory lubricant, or surface oxidation contaminates these contacts, the electrical resistance fluctuates erratically. The mouse’s onboard microcontroller misinterprets these disrupted signal phases as a reverse rotation, registering an inverted scroll step.
Quick Diagnostic Matrix
| Symptom / Behavior | Underlying Cause | Diagnostic Test | Recommended Fix |
| Occasional reverse tick every 4–5 steps | Dust, lint, or migrated factory grease on the encoder contact tracks | Spin wheel rapidly; test on an online scroll tester | Blow high-pressure compressed air directly into the wheel gap; flush with 99% IPA. |
| Erratic jumping in both directions regardless of speed | Heavily oxidized or contaminated internal encoder wiper contacts | Multimeter continuity / Oscilloscope | Flush encoder with DeoxIT D5 / Contact Cleaner or replace the encoder. |
| Wheel feels loose, mushy, or spins with zero tactile steps | Broken internal detent spring or rounded hexagonal wheel stem | Physical tactile feedback | Check if stem is cracked; replace the scroll wheel or encoder housing. |
| Jumping occurs immediately after a software or OS update | Corrupted onboard mouse memory or G HUB configuration conflict | Test mouse on a secondary PC without G HUB | Update firmware via Logitech G HUB; reset On-Board Memory profiles. |
| Jumping persists after thorough solvent flushing | Physical wear through the micro-thin gold/silver contact plating | Disassembly / Visual inspection | Solder a new 8mm encoder (TTC Gold / Kailh) or install a hot-swap daughterboard. |
1. High-Velocity Debris Evacuation (Non-Invasive)
Before disassembling the mouse, attempt to clear superficial lint and hair wedged between the scroll wheel’s hexagonal drive axle and the encoder ring.
[Scroll Wheel Chamber Cross-Section]
 ┌────────────────────────────────────────────────────────┐
 │ Top Shell Frame                                        │
 │              ┌───────────────┐                         │
 │ Compressed   │  Rubberized   │   Compressed Air Stream │
 │ Air Stream   │ Scroll Wheel  │ ══════════════════════► │
 │ ═══════════► │   Assembly    │                         │
 │              └───────┬───────┘                         │
 │                      ▼                                 │
 │     [8mm TTC Rotary Mechanical Encoder]                │ <── Target housing
 └────────────────────────────────────────────────────────┘
- Turn off the mouse using the power switch on the bottom plate.
- Invert the mouse so the scroll wheel faces downward onto a flat, clean surface (allowing gravity to pull dislodged particulate out rather than deeper into the chassis).
- Roll the wheel rapidly against your desk, mousepad, or palm back and forth for 30 to 45 seconds. This can physically scrape light oxidation or redistribute dried lubricant off the active contact path.
- Attach the thin straw nozzle to a can of compressed air.
- Direct short, high-pressure bursts directly into the gap flanking the left and right sides of the scroll wheel while continuously spinning the wheel.
- Power on the mouse and verify scroll integrity on an interactive browser-based scroll tester (e.g.,
scrolltest.com).
2. Chemical Contact Flushing (99% IPA or DeoxIT D5)
If compressed air fails, the issue is usually microscopic grease migration or oxidation across the encoder’s internal wiper tracks. Flushing the component with a fast-evaporating, plastic-safe solvent dissolves the residue without requiring mouse disassembly.
[External Capillary Flush Flow]
 Power OFF Mouse ──► Apply 2–3 Drops 99% IPA / DeoxIT to Encoder Seam
                           │
                           ▼
 Spin Scroll Wheel 50+ Times (Works Solvent into Wiper Contacts)
                           │
                           ▼
 Compressed Air Blast ──► Dry Completely for 20 Minutes ──► Power ON
- Power off the mouse and disconnect the charging cable or wireless receiver.
- Position the mouse on its right side so the left side of the scroll wheel (where the mechanical encoder resides) faces upward.
- Using a fine syringe, dropper, or precision spray tube, deposit 2 to 3 drops of 99% Anhydrous Isopropyl Alcohol (IPA) or DeoxIT D5 Electronic Contact Cleaner directly into the narrow seam between the scroll wheel rubber and the encoder housing.
- Critical Caution: Use only 99% IPA or specialized electronic contact cleaners marked safe for plastics. Never use WD-40 Multi-Use, mineral spirits, or automotive brake cleaner, as petroleum distillates will melt the ABS/polycarbonate internal skeleton.
- Immediately spin the scroll wheel vigorously in both directions for 60 seconds to work the liquid into the internal contact chamber.
- Use compressed air to blow out the excess liquid and dissolved grime.
- Allow the mouse to dry completely in a warm, ventilated space for at least 15 to 20 minutes before turning the power switch back on.
3. Verify Logitech G HUB Firmware & Onboard Memory
While scroll jumping is overwhelmingly a physical contact issue, corrupted onboard profile memory or an outdated firmware build can cause debounce-timing bugs inside the microcontroller.
[Logitech G HUB Diagnostic Flow]
 Settings > G Pro X Superlight > Check for Firmware Updates
              │
              ▼
 Toggle "On-Board Memory Mode" to ON
              │
              ▼
 Select Slot 1 > Restore Default Profile (Clears corrupted register macros)
- Connect the G Pro Superlight to your PC using its charging cable (wired mode ensures stable data transmission).
- Open Logitech G HUB.
- Click the gear icon to access the Global Settings, then select the PRO X SUPERLIGHT.
- Check if a Firmware Update is available. If so, execute the update and ensure the mouse remains connected throughout the flash process.
- In the mouse settings screen, toggle On-Board Memory Mode to On.
- Cycle through your active onboard profiles, select Profile 1, and restore it to default settings to clear any conflicting polling-rate hooks or assigned scroll macros.
- Test the mouse on a secondary PC without Logitech software running to verify that the issue is not caused by Windows scroll multiplier anomalies.
4. Disassembly and Encoder Maintenance
If non-invasive chemical cleaning fails, opening the mouse allows direct mechanical cleaning of the encoder contacts or retensioning of its metal housing tabs.
[GPX Bottom Plate Screw Map (Under PTFE Skates)]
 ┌────────────────────────────────────────────────────────┐
 │                      [Front Skate]                     │
 │                     (•) Screw 1 & 2                    │
 ├────────────────────────────────────────────────────────┤
 │                                                        │
 │                   [Center Sensor Ring]                 │
 │                                                        │
 ├────────────────────────────────────────────────────────┤
 │                     (•) Screw 3 & 4                    │
 │                      [Rear Skate]                      │
 └────────────────────────────────────────────────────────┘
Step A: Teardown
- Use a heat gun or hairdryer on its lowest heat setting for 5–8 seconds over the front and rear PTFE mouse feet (skates) to soften the adhesive.
- Peel the skates back carefully using a thin plastic pry tool or razor blade.
- Remove the four small Phillips #00 screws concealed underneath the skates.
- Gently unclip the top shell from the bottom base:
- Caution: Slowly hinge the top shell forward. The internal battery and daughterboard connect to the mainboard via fragile Flat Flexible Cables (FFC). Disconnect these ribbon cables by flipping up the connector lock gates before pulling the shell away.
[8mm Rotary Encoder Internal Mechanics]
 ┌────────────────────────────────────────────────────────┐
 │ Outer Metal Retention Casing                           │
 │   ┌──────────────────────────┐                         │
 │   │ Plastic Rotor Wheel      │                         │
 │   │   ┌──────────────────┐   │                         │
 │   │   │ Copper Wiper Arm │   │ <── Cleans carbon/gold tracks
 │   │   └─────────┬────────┘   │
 │   └─────────────┼────────────┘                         │
 │                 ▼                                      │
 │   [Resistive Base Plate with Channels A & B]           │
 └────────────────────────────────────────────────────────┘
Step B: Manual Cleaning and Casing Clamp
- Locate the scroll wheel assembly on the top daughterboard. The encoder is the three-pin component encasing the left axle of the wheel.
- Apply Direct Solvent: Place a drop of contact cleaner directly into the open top slots of the encoder and rotate the wheel manually.
- Casing Retensioning (The Clamp Trick):
- Over time, the four small metal crimp tabs holding the encoder sandwich together can relax, increasing the physical gap between the spinning wiper arm and the stationary circuit traces.
- Take a small pair of needle-nose pliers or precision tweezers and gently squeeze the metal tabs on the sides of the encoder housing inward.
- Tightening this sandwich restores firm mechanical downward pressure of the copper wiper prongs against the contact board.
- Reconnect the ribbon cables, power on the mouse temporarily, and verify if the jumping has ceased before applying fresh adhesive skates.
5. Hardware Replacement: 8mm Mechanical Encoder or Pre-Soldered Board
If the internal contact surfaces are physically worn through, the encoder must be replaced. The Logitech G Pro X Superlight requires an 8mm height encoder (measured from the center of the axle hole down to the mounting surface of the PCB).
[Encoder Height Dimensioning]
          ┌───┐
          │   │ ◄── Axle Hole Center Point
          └───┘
            │
            │ <── EXACTLY 8.0 mm
            │
 ═══════════╧═══════════ (PCB Surface)
Recommended Replacement Encoders (8mm Height):
- TTC Gold Dustproof (8mm): Features an enclosed rubber gasket that blocks dust and skin cells; distinct, tactile scroll steps.
- TTC Silver (8mm): Factory-standard replacement; smooth, medium-tactility action.
- Kailh Red Core (8mm): Slightly softer, lower operating force with reliable contact life.
- ALPS (8mm): Exceptional mechanical longevity and highly defined, tactile resistance.
Method 1: Solder a New Encoder (Component-Level Repair)
- Detach the small scroll wheel / switch daughterboard from the mouse shell by unscrewing the mounting screws.
- Desolder the three signal pins and two large structural ground legs of the defective encoder using a chisel-tip soldering iron set to $350^circtext{C}$ and copper desoldering braid (wick) or a solder sucker.
- Clean the solder pads with 99% IPA.
- Seat the new 8mm encoder flush against the PCB. Ensure the axle hole aligns horizontally.
- Solder the ground anchoring lugs first to lock orientation, then solder the three signal pins with 63/37 leaded solder.
Method 2: Install a Solderless Hot-Swap Daughterboard (Drop-In Upgrade)
If you do not have soldering equipment, third-party manufacturers produce drop-in replacement daughterboards specifically for the G Pro X Superlight.
[Drop-In Replacement Daughterboard Assembly]
 ┌────────────────────────────────────────────────────────┐
 │ GPX Dedicated Switch & Encoder Daughterboard           │
 │                                                        │
 │  ├── Pre-installed 8mm Gold Encoder (Ready to use)     │
 │  ├── Hot-swap sockets for Left/Right primary switches  │
 │  └── Factory-spec FPC ribbon connector                 │
 └────────────────────────────────────────────────────────┘
- Purchase a pre-assembled G Pro X Superlight Switch & Encoder PCB (available with Kailh, TTC Gold, or optical encoders).
- Unscrew the factory daughterboard from the top shell.
- Unclip the ribbon cable.
- Drop in the new pre-soldered board, secure the screws, reconnect the ribbon cable, and reassemble the mouse.
If the scroll wheel continues to register reversed inputs after replacing the physical encoder or installing a clean daughterboard, the failure lies in broken copper traces inside the flexible flat ribbon cable (FFC) or degraded input registers on the mouse’s primary Nordic nRF52-series microcontroller, which requires replacing the ribbon interconnect or the mainboard.