
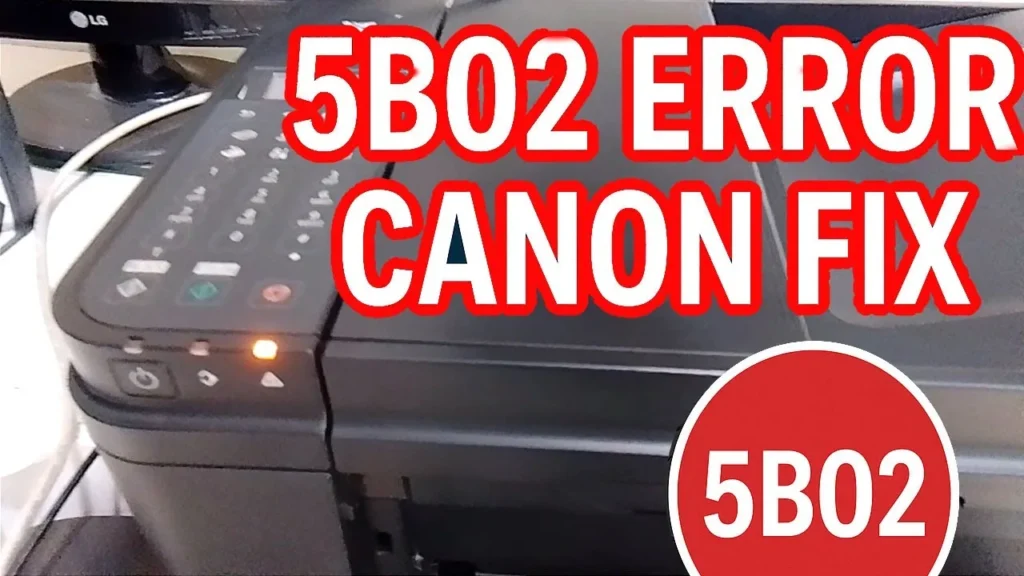
How to Fix Canon PIXMA MG3600 Support Code 5B02 (Ink Absorber Full)
Canon PIXMA MG3600 series printers (including MG3620, MG3640, and MG3650) display Support Code 5B02 (accompanied by the Power and Alarm lamps flashing alternately 7 times, or the Alarm lamp blinking 10 times) when the internal waste ink absorber counter in the non-volatile EEPROM reaches 100% capacity.
Resolving Support Code 5B02 requires a two-stage fix: resetting the firmware EEPROM counter via Service Mode, and servicing the physical waste ink pads to prevent liquid overflow.
Quick Diagnostic Matrix
| Symptom / Light Code | Underlying Condition | Diagnostic Stage | Recommended Fix |
| Power & Alarm flash alternately 7 times | Main waste ink counter (Black/Color) has reached $100%$ saturation in EEPROM | Hardware Lockout | Boot into Service Mode (5 or 6 Stop presses); reset counter with Canon Service Tool or WIC Reset. |
| Error 006 in Service Tool when clicking “Set” | Printer is not in active Service Mode, or USB port communication timed out | Software Link | Re-enter Service Mode until Power LED stays solid Green; connect directly to PC USB port. |
| Power LED remains solid Orange or flashes during Service boot | Service Mode boot sequence rejected or EEPROM write-protection latched | Firmware Lockout | Retry entry using 6 presses; if permanently locked, replace or reprogram the onboard 8-pin EEPROM IC. |
| Printer prints after reset, but ink pools underneath chassis | Waste ink felt pads physically saturated; ink overflowing overflow channels | Physical Spillover | Disassemble base chassis, wash and dry felt pads, or install an external waste ink drain tube. |
| Code 5B02 cleared, but prints emerge blank or streaked | Air trapped in printhead nozzles after extended idle period or purge lock | Fluidics | Run one standard deep cleaning cycle; verify genuine ink cartridge vent paths are unobstructed. |
1. Boot the Printer into Canon Hardware Service Mode
To allow external diagnostics to write to the EEPROM registers, the printer must be booted into its diagnostic Service Mode. Standard USB driver commands will fail if the printer is booted normally.
[Service Mode Button Timing Sequence]
 1. Printer is Powered OFF (AC cord remains plugged in).
 2. Press & HOLD [Stop] Button ────────────────┐
 3. Press & HOLD [Power] Button ───────────────┼── Keep both held for 2 seconds.
 4. RELEASE [Stop] Button (Keep [Power] HELD) ──┘
 5. While holding [Power], PRESS [Stop] Button EXACTLY 5 TIMES.
 6. RELEASE the [Power] Button.
 7. Wait 10–20 seconds: Power LED flashes Green ──► Transitions to SOLID GREEN.
Ensure the printer is turned off, but the AC power cable is firmly connected to a wall outlet.
Connect the printer to a Windows PC using a high-quality USB-A to USB-B cable. (Wi-Fi connectivity is completely disabled by firmware while in Service Mode).
Press and hold down the Stop button (red inverted triangle inside a circle).
While continuing to hold the Stop button, press and hold down the Power button.
Continue holding the Power button, and release the Stop button.
While still holding the Power button, press the Stop button exactly 5 times.
Alternate Timing: If the printer fails to register 5 presses on your regional board revision (Power LED continues to blink or turns orange), repeat the procedure using 6 presses instead of 5.
Release the Power button.
Observe the indicator lights:
The green Power LED will blink for 10 to 20 seconds while the internal carriage performs an abbreviated initialization.
Target State: The Power LED stops blinking and remains solid Green. This confirms the printer has entered Service Mode and Windows will detect a device named
CanonDeviceorCanon MG3600 Series (Copy 1).
2. Reset the Waste Ink Absorber Counter (EEPROM Write)
Once the machine is held in Service Mode, use a compatible service utility to write an initialization zero-byte to the main ink absorber registry.
[EEPROM Counter Communication Pipeline]
 PC Utility (Service Tool / WIC) ══ (USB Interface) ══► Canon Device (Service Mode)
                                                               │
                                                               ▼
 ┌─────────────────────────────────────────────────────────────┐
 │ Mainboard EEPROM (SPI Flash: e.g., 24C16 / 25Qxx)           │
 │  ├── D=xxx.x% (Main Absorber Memory Block)  ──► Set to 0.0% │
 │  └── P=xxx.x% (Platen Absorber Block)      ──► Set to 0.0% │
 └─────────────────────────────────────────────────────────────┘
Option A: Using Canon Service Tool (v3400, v4905, v5103, or v5306)
Download a verified copy of Canon Service Tool (versions
ST_v4905orST_v5103work reliably with the MG3600 series).Right-click the
.exefile and select Run as administrator.In the printer feed tray, insert 2 sheets of plain A4 paper.
In the Service Tool interface:
Locate the section titled Ink Absorber Counter.
Set Absorber to Main (or All).
Ensure Counter Value (%) is set to
0.Click the Set button directly adjacent to the counter field.
The printer will make a mechanical movement and print a confirmation line (typically indicating
D=000.0%).Locate the Platen absorber counter field (if present), set it to
0, and click Set.Click the EEPROM button at the top to print a diagnostic configuration sheet:
Confirm that the line reading
D=displays000.0.
Turn off the printer using the physical Power button.
Disconnect the USB cable, wait 10 seconds, and turn the printer back on normally.
Option B: Using WIC Reset Connect Utility
If Canon Service Tool throws an Error 006 or freezes, use the cross-platform WIC Reset Connect utility:
Download and install WIC Reset Utility.
Keep the printer connected via USB in Service Mode.
Launch WIC Reset;
Click Read Waste Counters to inspect current saturation (will show
Click Reset Waste Counters.
Enter a valid reset key when prompted.
Once the completion dialog appears, power off the printer and power it back on normally.
3. Clean or Replace the Physical Waste Ink Absorber Pads
Clearing the software counter resets the firmware lockout, but the physical felt sponges inside the bottom of the printer remain saturated. If you have printed thousands of pages or performed multiple deep cleaning cycles, the pads will leak ink onto your desk if not maintained.
[Chassis Disassembly & Base Layout]
 ┌────────────────────────────────────────────────────────┐
 │ Upper Flatbed Scanner Unit                             │
 ├────────────────────────────────────────────────────────┤
 │ Middle Print Engine / Carriage Bay                     │
 ├────────────────────────────────────────────────────────┤
 │ Lower Plastic Chassis / Base Tray                      │
 │   ┌────────────────────────────────────────────────┐   │
 │   │ [Porous Felt Absorber Pads (Part # QY5-0558)]  │   │ <── Heavy ink saturation
 │   │ ░░░░░░░░░░░░░░░░░░░░░░░░░░░░░░░░░░░░░░░░░░░░░ │   │     (Under Purge Station)
 │   └────────────────────────────────────────────────┘   │
 └────────────────────────────────────────────────────────┘
Safety Preparations: Put on heavy nitrile gloves and lay down several layers of newspaper or plastic sheeting. Waste ink contains glycol-based pigments and dyes that permanently stain surfaces and skin.
Accessing the Absorber Cavity:
Unplug the power and USB cables.
Remove the rear paper guide and front output tray.
Remove the two Phillips screws on the back cover and unclip the left and right plastic side panels using a flat plastic pry tool.
Release the internal chassis clips to separate the scanner assembly and upper frame from the lower plastic floor.
Removing the Felt Sponges:
Locate the thick white/black felt pads filling the bottom channels of the base tray (particularly the large pad seated directly beneath the right-side purge pump station).
Using tweezers or pliers, lift the saturated felt segments out of the plastic alignment pins.
Washing and Drying:
Place the pads in a bucket of warm tap water.
Squeeze and knead the pads repeatedly until the water runs mostly clear. (Do not twist or wring forcefully, or the synthetic fibers will warp and lose their fluid-holding geometry).
Press the pads flat between thick paper towels or old rags to extract moisture.
Allow the pads to dry completely in the sun or near a fan for 24 to 48 hours. (Reinstalling damp pads introduces moisture into internal logic components).
Reinsert the dried pads into their molded plastic channels and reassemble the printer casing.
4. Install an External Waste Ink Drain Tube (Permanent Fluid Solution)
To avoid tearing down the printer chassis to wash felt sponges in the future, you can reroute the purge pump’s fluid discharge line directly into an external reservoir.
[Purge Pump Rerouting Modification]
 [Purge Station Rubber Cap]
             │
             ▼
   [Peristaltic Pump Motor]
             │
             ▼ (Factory Silicone Hose)
     [X CUT HERE / DISCONNECT FROM INTERNAL FLOOR]
             │
             ├── Connected via 3mm Barb Coupler
             ▼
     [Flexible Silicone Extension Tube] ══► Routed out through rear casing notch
                                                     │
                                                     ▼
                                      [External Waste Ink Bottle]
Open the rear or side panel to access the clear silicone hose descending from the purge pump on the right-hand side.
Detach the hose from the bottom chassis connector leading into the internal felt pads.
Attach a $3text{ mm}$ (outer diameter) barb union connector to the hose, and attach a $30text{ cm}$ length of medical-grade silicone tubing.
Drill a small $5text{ mm}$ hole in the rear plastic housing of the printer.
Thread the extension tube through the hole and secure it with a cable clip.
Feed the tube into a small, vented external plastic bottle (such as an empty ink refill bottle) secured to the side or rear of the printer with industrial double-sided tape.
Empty the external bottle whenever 50 to 100 mL of waste ink accumulates.
5. Troubleshooting Service Mode Lockout (Solid Orange LED / Error 006)
If your MG3600 printer fails to enter Service Mode—or if the Service Tool displays Error Code 006—the printer’s service interface is blocked.
[Diagnostic Breakdown for Service Mode Failures]
 ├── Power LED turns SOLID ORANGE on boot:
 │    └── Mainboard EEPROM is locked by Canon anti-reset firmware or wrong button presses.
 └── Service Tool returns "Error 006":
      └── Communication dropped; printer is in standard operating mode, not Service Mode.
Resolving Error Code 006:
Confirm that the Power LED is solid green before launching the software. If the LED is blinking, the printer is still cycling internal hardware checks.
Unplug all other USB devices (printers, scanners, flash drives) from the PC to prevent port-polling collisions.
Avoid USB 3.1/3.2 Gen 2 ports or external unpowered USB hubs; plug directly into a USB 2.0 rear motherboard port.
Recovering from an EEPROM Firmware Lock:
If a previous attempt used an incompatible service tool (such as older ST v2000), Canon’s firmware permanently locks the software Service Mode flag to prevent tampering.
When this occurs, pressing the Stop button 5 or 6 times will cause the printer to boot into an unrecoverable solid Orange Alarm state.
The Hardware Fix: In this scenario, software utilities cannot communicate with the board. The only resolution is replacing the main logic board (QM7-4570 / QM4-4428) or using an external EEPROM programmer (such as a CH341A USB programmer with an SOIC8 test clip) to flash a clean, un-tripped binary dump onto the onboard SPI flash chip (typically labeled
4G16/24C16).