
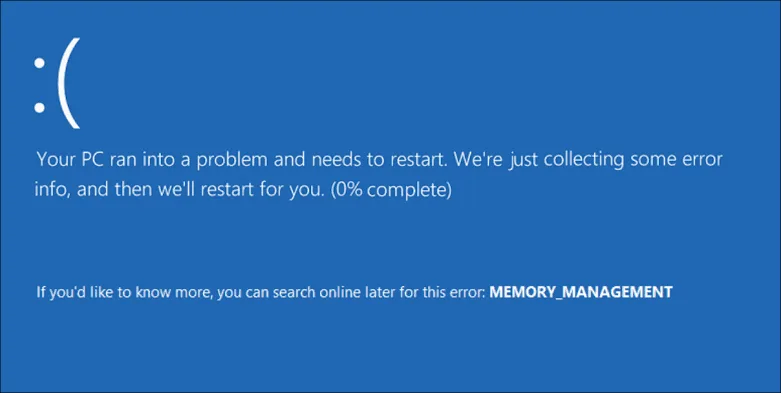
How to Fix “Memory Management” Blue Screen When Installing Windows 11
The MEMORY_MANAGEMENT bug check (Stop Code 0x0000001A) during Windows 11 installation occurs when the Windows Preinstallation Environment (WinPE) or the setup kernel encounters fatal memory corruption while executing in RAM. During installation, Windows expands compressed system archives (install.wim or install.esd) into dynamic RAM staging buffers before writing them to the storage drive. If the kernel memory manager (ntoskrnl.exe) detects page table corruption, an invalid Page Frame Number (PFN), or a hardware bit-flip during this sustained high-bandwidth memory stress, the kernel triggers an immediate bug check to prevent writing corrupted operating system binaries to disk.
This failure during installation is typically caused by active memory overclock profiles (XMP, DOCP, or EXPO), a physically defective DRAM module, corrupted USB installation media mimicking memory corruption, outdated motherboard UEFI memory-training microcode, or a failing NVMe SSD dropping off the PCIe bus during scratchpad operations.
Quick Diagnostic Matrix
| Stage of Failure | Root Cause | Inspection / Tool | Recommended Fix |
| Crashes during “Loading files” (initial WinPE boot) | Unstable DRAM frequency, corrupted boot.wim, or bad USB stick | BIOS / Flash Drive | Disable XMP/EXPO; recreate USB installer using the official Media Creation Tool. |
| Crashes at “Getting files ready for installation” (0%–50%) | Bit-flip during high-throughput .wim decompression into physical RAM | Hardware / Single DIMM | Isolate faulty RAM stick; run a single stick in primary slot A2 at base JEDEC speed. |
| Crashes on first reboot (“Getting devices ready”) | Outdated BIOS memory training microcode or NVMe controller write failure | UEFI BIOS / Diskpart | Update motherboard BIOS; execute diskpart clean and convert target drive to GPT. |
| 4 RAM sticks installed; crashes randomly across setup | Integrated Memory Controller (IMC) failing to drive 4-DIMM daisy-chain bus | Motherboard Layout | Remove 2 modules; run standard dual-channel in slots A2 and B2 only. |
| Setup hangs/crashes when selecting target drive | Target NVMe PCIe bus latency, missing VMD/storage drivers, or partition collision | UEFI / Storage Slot | Switch PCIe slot mode to Gen 3/Gen 4; disable Intel VMD/RST if using AHCI/NVMe. |
1. Disable XMP, DOCP, or EXPO (Enforce JEDEC Baseline)
Memory overclock profiles (Intel XMP, ASUS DOCP, AMD EXPO) are the most frequent cause of 0x0000001A during Windows setup. While an overclock profile may appear stable during light loads or within an existing OS, unpacking multi-gigabyte compressed .wim containers across thousands of memory pages simultaneously will trigger parity errors if sub-timings or memory controller voltages fluctuate.
[UEFI BIOS Memory Settings]
 Advanced / Extreme Tweaker / OC Menu
   ├── XMP / DOCP / EXPO Profile ──► [Set to DISABLED]
   ├── DRAM Frequency            ──► [Set to AUTO] (Enforces Base JEDEC Standard)
   │                                   ├── DDR4: 2133 MHz / 2400 MHz
   │                                   └── DDR5: 4800 MHz / 5200 MHz
   └── DRAM Voltage              ──► [Set to AUTO]
Power on your PC and tap
DelorF2repeatedly to enter the UEFI BIOS.Locate the memory tuning screen (labeled Ai Tweaker, Extreme Tweaker, OC, or Overclocking).
Find XMP (Intel), DOCP, or EXPO (AMD) and switch it to Disabled or Auto.
Verify that the memory frequency drops to the baseline standard for your memory generation (e.g., $2133text{ MHz}–2666text{ MHz}$ for DDR4; $4800text{ MHz}$ for DDR5).
Press
F10to save changes and restart the PC into the Windows 11 installation media.
2. Isolate Physical DRAM Modules (Single-Stick Diagnostic)
If disabling memory overclocking does not resolve the crash, one of your physical DRAM modules likely contains bad memory cells, or your motherboard’s memory controller is struggling to drive multiple sticks simultaneously over a daisy-chain trace topology.
[Motherboard DIMM Slot Configuration]
       [CPU SOCKET]
          │
          ├── [Slot A1]  (Channel A - Inner)
          ├── [Slot A2]  (Channel A - Outer) ◄── [INSERT SINGLE TEST MODULE HERE]
          ├── [Slot B1]  (Channel B - Inner)
          └── [Slot B2]  (Channel B - Outer)
Turn off your PC and disconnect the AC power cord.
Open the chassis and remove all RAM modules except one stick placed in Slot A2 (the second slot outward from the CPU socket, which is the primary termination point on modern daisy-chain motherboards).
Attempt to run the Windows 11 installation:
If the installation succeeds: The module in Slot A2 is healthy. The issue is either the second stick of RAM, an unseated module, or an unstable 4-stick load on the CPU’s memory controller.
If the installation crashes with MEMORY_MANAGEMENT: Power down, remove that stick, insert the second stick into Slot A2, and retry installation.
If a specific module consistently triggers the blue screen in Slot A2 while the other passes, that specific RAM stick has suffered physical hardware degradation and must be replaced.
3. Recreate the Windows 11 USB Media on a Different Flash Drive
A corrupted sector on the USB installation drive frequently mimics physical RAM failure. If the file sourcesinstall.wim or boot.wim has dropped bytes during the media creation process, WinPE attempts to parse invalid structures into RAM, triggering a kernel memory fault identical to a defective memory stick.
[USB Creation Verification Flow]
 1. Discard current USB drive (Eliminate slow/degraded NAND flash).
 2. Download fresh ISO via Microsoft Media Creation Tool.
 3. Use Rufus or Media Creation Tool to reflash:
      ├── Partition Scheme: GPT
      ├── Target System:    UEFI (non-CSM)
      └── File System:      FAT32 (or NTFS with UEFI Bootloader)
 4. Connect USB directly to Rear Motherboard I/O Port (Bypass Front Panel).
Do not reuse the existing USB drive or existing ISO image.
Download a fresh copy of the Windows 11 Media Creation Tool from Microsoft on a separate, working computer.
Flash the installer to a verified, high-speed USB 3.0/3.2 flash drive (avoid cheap, generic, or aging USB 2.0 thumb drives).
If using Rufus:
Set Partition scheme to GPT.
Set Target system to UEFI (non-CSM).
Plug the installation drive directly into a rear I/O USB port directly on the motherboard. Avoid front-panel case ports, external USB hubs, or keyboard pass-throughs, which introduce packet loss and signaling errors that corrupt the installation data stream.
4. Update Motherboard UEFI BIOS (DDR5 & CPU Microcode Fixes)
On newer hardware platforms (particularly AMD AM5 and Intel 13th/14th/15th+ Gen platforms), early BIOS revisions have unstable memory training algorithms that fail to calculate correct trace termination impedances ($ODT$). Updating the BIOS delivers revised AGESA/microcode packages that resolve memory management panics during high-load I/O operations.
[BIOS Flashback / Q-Flash Plus Workflow (No OS Required)]
 1. Download latest stable BIOS from Motherboard Manufacturer Support Page.
 2. Extract and rename the BIOS file according to OEM standard (e.g., creative.rom / gigabyte.bin).
 3. Place file on FAT32-formatted USB drive.
 4. Insert into dedicated "BIOS Flashback" rear port.
 5. Press dedicated Flashback button for 3 seconds ──► Wait for LED to finish blinking.
Visit your motherboard manufacturer’s support portal (ASUS, MSI, Gigabyte, ASRock) on another PC.
Download the latest stable BIOS build (avoid beta versions unless they explicitly patch a memory compatibility issue for your CPU model).
Flash the BIOS using either the internal UEFI flash utility (e.g., ASUS EZ Flash, MSI M-Flash) or your board’s rear USB Flashback button.
After flashing completes, boot into BIOS, load Optimized Defaults (
F5), ensure memory profiles remain disabled, and re-attempt the installation.
5. Wipe Target NVMe SSD and Convert to Clean GPT via Diskpart
If the destination drive contains leftover partitions from a prior Linux installation, corrupted Master Boot Records (MBR), or damaged filesystem structures, Windows Setup can crash when attempting to initialize the scratchpad paging partition.
[Windows Setup Screen]
 └── Press [Shift + F10] (or Shift + Fn + F10) to open Command Prompt
      └── diskpart
           ├── list disk
           ├── select disk X     <── (VERIFY TARGET OS DRIVE NUMBER)
           ├── clean
           └── convert gpt
Boot into the Windows 11 installer up to the initial “Install Now” or language selection screen.
Press Shift + F10 (or Shift + Fn + F10 on some keyboards) to open the Administrator Command Prompt.
Launch the disk partitioning utility:
DOSdiskpartList all physical storage drives attached to the system:
DOSlist diskIdentify your target destination drive (e.g.,
Disk 0), then select it:DOSselect disk 0(Ensure you select the correct drive number; the next step erases the drive).
Strip all existing volume structures, file tables, and corrupted hidden partitions:
DOScleanRe-initialize the drive partition table to the UEFI-mandated standard:
DOSconvert gptType
exittwice to close both Diskpart and Command Prompt, then proceed with the standard installation wizard. When prompted for where to install Windows, select the single entry labeled Drive 0 Unallocated Space and click Next without manually creating partitions.
6. Adjust NVMe PCIe Link Speed & Storage Controllers
A failing NVMe Solid State Drive or an unstable PCIe Gen 4/Gen 5 link will drop transmission packets during write bursts. Because WinPE caches disk write queues directly in nonpaged RAM, a dropped storage connection manifests as an unhandled MEMORY_MANAGEMENT fault.
[UEFI BIOS > Advanced / Onboard Devices Configuration]
 ├── PCIEX16 / M.2 PCIe Link Speed ──► [Change from AUTO/GEN5 to GEN4 or GEN3]
 ├── Intel Rapid Storage / VMD     ──► [Set to DISABLED] (Use native AHCI/NVMe)
 └── SATA Operation Mode           ──► [AHCI Mode]
Enter your UEFI BIOS.
Navigate to Advanced > Onboard Devices Configuration (or PCI Subsystem Settings).
Locate the link speed setting for your primary M.2 slot:
Change it from Auto or Gen 4 / Gen 5 down to Gen 3 or Gen 4. If you are using a PCIe riser cable (common in vertical GPU or Small Form Factor builds), PCIe signal degradation often trips memory exceptions until forced to a lower link speed.
Under storage configuration:
If running an Intel system, locate Intel VMD Technology (Volume Management Device) or Intel RST:
Set it to Disabled unless your setup uses a hardware RAID array. Leaving VMD enabled without loading Intel RST F6 drivers into the Windows 11 installer causes storage access loops that crash the setup kernel.
If your NVMe SSD lacks a thermal heatsink, inspect its physical temperatures. High-performance Gen 4/Gen 5 drives will enter thermal protection and drop off the PCIe bus if installed bare under heavy uncompression loads.
If the installer continues to halt with MEMORY_MANAGEMENT after enforcing base JEDEC memory clocks, testing each DRAM stick individually in slot A2, flashing the latest motherboard BIOS, using freshly created USB installation media, and converting the target SSD via diskpart clean, the defect is hardware-bound. This points to a silicon fault inside the CPU’s Integrated Memory Controller (IMC), a cracked trace along the motherboard’s memory bus, or a failing flash controller on the target NVMe SSD that faults under sustained sequential write operations. Testing the installation on an alternate storage drive or verifying the memory sticks in another host machine will confirm whether the CPU or the drive hardware requires replacement.